Visitors to Date:

blog counter

Building a House in Kala Point, Port Townsend, WA

Building a House in Kala Point, Port Townsend, WA
A running narrative of first-time builders of their retirement home in Port Townsend, WA (NE corner of the Olympic Pennisula, 60 miles NW of Seattle). Follow us as this adventure unfolds in late 2008 and beyond. 18 months under construction, we moved in on May 25th, 2010. Photo taken August 15, 2010.

Search This Blog

Saturday, December 11, 2010

Tung Oil on White Oak (Day 773)

Mills Interiors (Tyrus) came out last week and beat down the last part of our upstairs bedroom floor. Its 4" T&G quarter-sawn and rift-cut white oak from Vermont. We had enough left over from the bedroom that we did the closet too. Best looking closet floor this side of the White House.

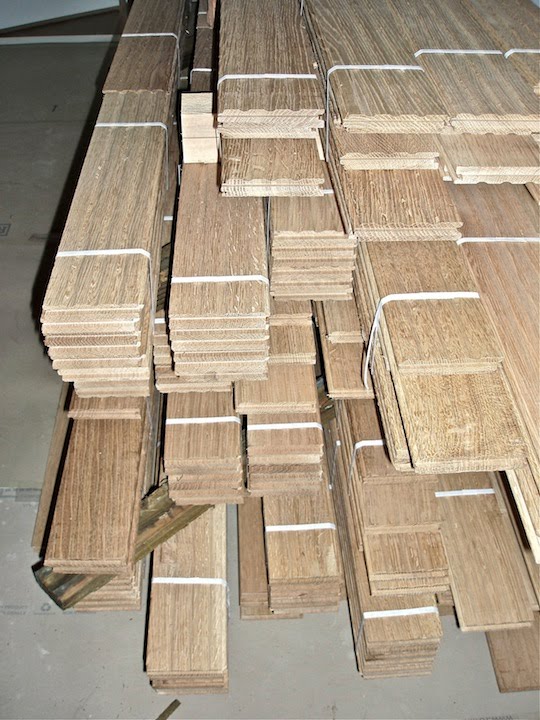
Tyrus did the primary drum sanding in about 4 hours then filled all (most) the gaps and nail holes with a commercial wood putty. Then he did the whole floor again with a 3-head circular floor sander, starting with a medium paper and finishing with a fine (220? grit) paper. Vacuumed everything and declared it ready for finishing, which was my job. Whole process took about 12 hours to lay the floor and 10 hour to sand it.

The next morning I went up to dry tack the floors, which gets that last little bit of junk off the floor. I noticed that Tyrus missed a dozen+ holes, so out came the putty and knife. No big deal, and better to fill before than after the tung oil goes on.

Just what is tung oil. Notice that's not Tongue Oil. Here's what Wikipedia has to say:

"Pure tung oil is made from the pressed seed from the nut of the tung tree (Vernicia fordii), which is in the Spurge family, native to southern China, Burma and Vietnam. The wood of the tree is lightweight and strong, and is sometimes used as a substitute for basswood or balsa.
Pure tung oil is considered a drying oil much as are linseed, safflower, poppy, and soybean oils. When applied, it provides a tough, highly water-resistant finish which does not darken noticeably with age as does linseed oil. It is not a colorless finish; rather, it has a slight golden brown tint. Pure tung oil has gained popularity recently among environmentally conscious consumers [like the Machettes]. Some regard it to be superior to linseed oil, which is susceptible to mold", a well known problem in rainy humid climates (like WA).

The finishing process is rather simple, which is good. You two persons do the finishing; one cuts in the edges in advance of the mop guy. However, since we didn't have any base molding up yet, I just did it alone. The applicator is a lambs wool cover over a wood slat, which is screwed on to a handle (expandable helps). You mop on a liberal coat of Tung Oil Sealer with the grain, then go back and make long strokes the entire length of the floor to eliminate any puddles or lap marks. I taped off all the door jambs to protect them from the tung oil. Mopping the entire floor (ca. 600 sq. ft) takes about an hour, but its hard on the back for an old fart like me. So, I only put one coat of sealer on each of the first two days. When I went to inspect my dried tung oil finish I was disappointed. There was way to many buggers (mostly dust and some hairs) in it, and it was noticeably rough to the touch. Crap, I should have wet tacked the floor with a cotton rag dampened (not wet) with mineral spirits.

So to remedy my mistake, I lightly sanded the entire floor with a polisher and a fine grit pad, knocking off any highs and dust buggers. The pads come in different colors, each with a different abrasive power. Can't find anyone that will tell me which to use, so I started with a mild one (red) but ended up using a green pad. Probably could have done it all with the coarsest pad, which is black. I hit the corners and jamb bases with a 3M pad on my orbital sander and that turned out nice. After that, I wet tacked the floor as mentioned above. Now I'm set to put on the final coat of Tung oil finish, which is a slightly thinner mix of Tung oil than the sealer coats. I'll let the floor dry for a week with the radiant heat on, and you're ready to move back in. Waterlox says that the oil continues to harden for 30 days with exposure to air.

The first sealer coat took about 1.1 gals of tung oil, whereas the second coat took about 0.8 gals. Had a bit left over from the 2 gals I bought by mail order (PaintSource, best deal around). I have a whole gal of finish which should be enough. Each coat goes on a less permeable surface, thus less and less is used as your build out the finish.
The total cost to finish the 600 sq ft of oak was about $298 or 50¢ per square ft as outlined below (so I'll know what to re-order in a few years):

16" lambswool floor coating applicator, $14
16" lambswool floor coating applicator, refill, $10
Waterlox Satin TB-6044 (sealer), 2 gals, $150
Waterlox Original Sealer/Finish, 1 gal, $56
Polishing pad, green, $5
17" Polisher, rental 4 hrs, $28
Misc. supplies, putty, sandpaper, $35

P.S. During a dry spell this week, I took a couple hour out to clean out the gutters. They were half to entirely full, mainly of small cedar cones, needles and some fir twigs and branches. I did them late last May, so its only been 6 months. It looks like this will be a twice yearly chore, but at 2 hours its no big deal.

Tuesday, November 23, 2010

Early Big Snow (Day 755)

I've been diddling around on the house for the past few weeks, finishing the backsplash tiling, hooking up the ceiling speakers and volume controls, and preparing for the final naildown of the upstairs flooring. Also did a major clean/organize of the garage to make room for my (new to me) Delta unisaw. Picked up this 10-yr old unit on Craigslist from a hobbyist in Bainbridge. He was downsizing his shop, to my benefit. Went there to look at it only knowing it was a 3-hp 10" cabinet saw; on inspection it is a 5-hp 220v saw with router table, Makita plunge router, and rolling saw base. Sweet--I cleaned up on this one. Then I had to wire the outlets for 220v (match outlets to saw), make up a long extension cord, and make some space for it.

Yesterday morning we awoke to a rude suprise. It was snowing up here in Paradise by the Bay. Not supposed to do that—we left the snow behind in Denver. To make matters worst, it snowed all day, blew all night and turned into a major winter scene. 6" on the flats, 12" elsewhere. Managed to buy one of the last snow shovels at the True Value store, and am going out to this morning get some snow melt stuff. If it turns cold (as forecast), any ice will be with us for a few weeks. Otherwise, all is well. Upstairs bath cabinets are scheduled for delivery tomorrow, the floor guy will get up here when the roads clear, and there is a big turkey in the frig. No worries.


Tuesday, November 2, 2010

Tiled Backsplash (Day 734)

One of the many things that I've let slip is the tiled back splash in the kitchen. It was easy to avoid, since many other jobs had a higher priority, like the bathrooms. Well, as the punch list gets shorter, this one surfaced on my spouse's radar screen. We've had the tile for months, so there was no excuse to not start the back splash.

She had picked out a beautiful 3" x 6" tile (i.e. $$$), hand made in Portland by Pratt & Larson. The glaze is a translucent light green, with a crackled surface. Low fired ceramic, like butter to cut. However, laying these tiles had been worrying me because Nancy likes thin grout lines. It wasn't going to happen in this case because the hand-made tiles are a bit irregular, like ±1/16" around the margins. That was fine; they definitely have a Craftsman feel to them, which is what we wanted.

We settled on 3/16" spacers for the 3" x 6" subway tiles, which we laid in a running bond pattern (50% offset on each layer). The back splash behind the range top was a piece of cake to lay up. Its about 9' long and 18" high (below the cabinets) to 36" high (below the hood), so the only cutting to do at at the ends. Conversely, the back splash continues around the full counter top, all the way to the appliance garage (surface mounted, front hinged cabinet for coffee stuff and toaster). This part of the back splash is only 5.5" high, so it involved cutting the second row of tiles at the window sill and around two outlets. Then the tile goes up the wall around two window units.

This is easy enough, but you have to keep an eye on where these will come out on top of the window—they all have to be at the same level (height about counter top)—because from here up we have to lay three full rows and make them come out parallel to the bridge board that ties the two blocks of hanging cabinets together.

We're not quite there yet, but I have my eye on this issue and will force the elevations to be the same by fudging here and there on the spacing of the tiles as they climb the wall. We have another days worth of cutting and laying, then it will be time to caulk, grout and seal the tiles. Its looking good so far; it'll be even better when its done.

2 Years and Counting (Day 730)

October 28, 2010. Two years and counting.
Here is our crude timeline for the house project.

Oct. 28, 2008. Broke ground with a big hole.
Feb. 14 , 2009. Ellis's finished framing.
Feb. 28, 2009. Roofs on, house is "dried in."
Aug. 15, 2009. Plumbing passes pressure tests.
Aug. 28, 2010. Rough electrical passes inspection.
Sept. 20, 2009. Dry wall installed and mudded out.
Jan. 18, 2010. All cabinets installed downstairs.
March 25, 2010. American Clay (plastering) finished
April 27, 2010. Passed final inspection.
May 14, 2010. Moved in—boxes everywhere.
Oct. 28, 2010. Two year anniversary of project.
July 25, 2011. 1000 days on the project. No blogging after this.

Some things just have to end gracefully.

Friday, October 22, 2010

White Oak Going Down, Tile is Next (Day 723)

Its mid October, the heat is on in the house , the leaves are falling, and most of the outside landscaping is done for now (still need lawn and shrubs in the front yard). So now its time to turn our attention back to the guts of the house, specifically the upstairs. Its pretty much like it was when we moved in with the exception that I'd spent a week painting windows and trim up there. We'll have guests up there in 2 weeks, so that's my current window of opportunity to make some progress.

In mid Sept, we had Mills Interiors (Bainbridge Island) deliver the flooring for upstairs. We ordered 550 sq. ft of 4" wide select white oak, quarter sawn (rift). This cut of wood is more stable than regular oak. We made this choice because of the radiant heating upstairs, which is a knockoff of the more expensive Warmboard we used elsewhere. In Sept, I'd moved the flooring bundles upstairs and stickered it to dry. After a month, my moisture meter showed about 7%, so it was time to nail it down. Mike Mills came by this week and laid most of it; all of the main floor and the bed platform, but didn't a long enough piece of bullnose to finish the one step up to the platform. So we have all but about 25 sq. ft laid. Surprisingly, we had 30-40 sq. ft left over, so I think I'll buy a bit more to finish off the closet (70 sq. ft) instead of using carpet.

Now its my turn to get into the bathroom and lay the porcelain tile. I'll extend the oak to under the door, and butt it up against the tile so this seam is largely hidden. The porcelain should go fast. Its a simple pattern using 12" x 12" and 6" x 6" tiles; about 60 sq. ft total. So compared to the other floor tiling in the house, this should be a piece of cake. (I probably shouldn't even say that.)

Also this week, we had Steve and Jere from Discount Cabinets of Washington (Sequim) come over to layout the bath cabinets. I'd already made the drawings, so it was a matter of confirming measurements and making a list. By the time Nancy got home, we had the cabinet sizes defined and it was a matter of picking the drawer face type (a dozen choices), wood type (four) and stain (probably a dozen). It took all of 90 seconds—damn this is getting easy.

Not really, but we went with quarter-sawn white oak to match the flooring, natural finish to match the floor, and Puritan style doors (simple Shaker) to match the others in the house. There are five cabinets on order: two 24" sink bases, and intervening 12" 4-drawer cabinet, and a 24" 4-drawer cabinet on the left (door) side. These will provide a 21" deep base for the rock counter top that we selected from the remnant pile at Richert's Granite and Marble, our favorite fabricator in the area (they are sailors, by the way).

The counter top is Mesabi Black Granite, which translates to a very coarse-grained gabbro or something like that. It has a honed finish, rather than polished, which gives the rock a whole different feel. We'd first seen honed granite in Vera Markgraf's Colorado mountain home and liked it for its rustic feel. The color comes out as dark gray, which will coordinate with the small black tiles interspersed with the green marble we'll use in the shower and tub.

Above the counter top, we'll have one wall-hung cabinet for towels and sheets and a wide mirror. We'll use the same strategy for the mirror as downstairs. We ordered 2 extra filler strips from the cabinet company. They'll be 3" side and 8 ft long, just enough to make the frame for a 3' x 5' mirror. Last time we made two cherry mirrors, 18" x 24" with beveled mirrors for about $200, which is a fraction of the cost from either the cabinet company or a furniture company. Even better, they match the cabinets perfectly.

Saturday, October 2, 2010

Shitty Day (Day 703)

I have a slightly funny story for you all. I've been paving and landscaping as you know (geology seems sort of mundane when you're doing such work), but yesterday morning everything turned to shit--literally. Nancy used the toilet and when I went in, it wasn't quite right. So I added to the pile (pun intended) and flushed away. Not much happened. Crap, I'd unloaded my closet snake at our garage sale before we left Denver. So off to the rental store, came back and snaked away to no avail. The toilet drained down in 15 minutes so it wasn't a complete blockage. Went outside and snaked the Kelly fitting (a clean-out fitting to go in or out on the line). No relief.

OK, go further downstream. Took off the primary septic tank cover and oops. Full of the BROWN to the brim. That's no good. Took the 3rd tank's cover off, the supposedly gray water pump tank and it was full. Not good. Looked like nothing was flowing, or in our case was being pumped to the septic drain field.

I know that this is not very interesting to you all, but maybe you'll have a septic system someday. Called my septic guy, no answer on the cell or home. (Turns out he took a job teaching at the local high school because business has been so slow for the last year). I called our septic designer (Suzanne Martin), and no reply. Called her office at (Miller Bay Water, Poulsbo), reached her dad and got a new phone no. Called, left a message and then a return call in about 1/2 hr.

She came over in a jiffy, said she probably knew what the problem was, and DID. When we had the septic inspection last winter, she said to be sure and turn the power on (and pointed to the control box at the rear of the house) when we got ready to use the system (i.e. move in). I logged that in my spongy brain. We moved in May 15th and turned the power on downstairs, along with many other circuit breakers.

So, it seems like we've been showering, laundering and crapping away in bliss for 4 months. This filled the 3 tanks to the brim (some drainage occurred out of the system by gravity) but yesterday the level got high enough that there was no where for new stuff to go.

Suzanne flipped on the power at the outside controller box and about 30 seconds later the pump put 45 gallons of gray water out into the drain field. It will continue to do this every 3 hrs until everything gets back to normal levels, in about 3 days. Then it reverts to normal mode and doses the field (technical jargon for pumping) with 45 gallons every 4 hours for a total of 270 gal per day. The daily total is dictated by the number of bedrooms in the house x 120 gals usage/bedroom per day. So our max. pumpage per day is 360 gals, nominally 270. However, since we only have a two bedroom house and a single couple living in it, our normal inside house water usage is probably about 100 gals a day. So once we get past this backup crisis, we should be back to normal, with 2-3 pump cycles per day. Now you know more than you need too about pressure-type septic systems.

Friday, October 1, 2010

Paver Patio Going Down (Day 702)

Winters coming (too soon) so why not get that patio finished. Yeah, it'll be a good place to hang out in January during our occasional snowstorms. Actually, I'd hoped to do it earlier in the year but other stuff got in the way.

We'd considered having Tim Hamm (Castle Rock Landscaping) put in a flagstone patio, but then had second thoughts. The main distraction of a natural rock patio is potential unevenness and weird stuff sprouting up between the small to large gaps between pieces. Secondly, to get nice big thick pieces of rock you have to lay out a small fortune. If set in sand, the rock should be 1-2" thick. Quartzite and other suitable (slatey) rocks go for 20-30¢ per pound ($400-$600/ton), and we were in for a couple tons to do this job. Not to say anything about horsing around several hundred pound pieces.

You can get away with thinner pieces (1/2 - 1") but these should be set in concrete. Well, when you go to the expense of laying a concrete slab, the patio becomes something of a Taj Mahal feature. In the long run we went for Dublin cobble (rounded) pavers from Belgard. They sell all sorts of pavers in a variety of colors. We selected a 3-piece mix: equal numbers of smalls (1/3rds), mediums (2/3rds), and larges (fulls). Each pallet has about 10 layers, each with equal amounts of each size. We ordered 2.5 pallets, enough to do about 275 sq. ft of patio (roughly 11' x 25').

Tim brought the pavers over in a couple pallet loads and we off-loaded them at the end of the day after he had finished some other Kala Point work. Since starting on our house last fall, ALL of his work has been in Kala Point or the Vineyards (our old rental subdivision), so this area has turned out to be pretty good for him. To bound the patio on the street side, Tim built another wall, this time around a mounded area (patio island) about 12-18" high. The plan was to plant some large shrubs and smaller rhodies on the island as a visible break from the driveway and street. That way we'll have some added privacy when we're dining or entertaining on the patio.

After leveling the patio area (shovel and rake, long board and level), I covered the area with landscape fabric to repel weeds (and blackberries, which come up everywhere) and held it down with large nails. Then Tim and I picked up three cubic yards (7500#) of 1/4" minus crushed basalt. This is everything that passes the 1/4" screen, and its a good base for patios. We wheelbarrowed and raked it into place, then ran a long board across the top to level it in a rough sense.

We rented a plate compactor, which is a vertical vibrator attached to a steel base plate. Fire that baby up and off you go. It really compacts material, and we did the whole patio in about an hour. Another shot at leveling with a long 2x6 board, then a final compaction. We ran out of time that day, but it conveniently rained over the weekend to keep everything in place.

Today (Mon. 9/27) we started laying pavers like mad men. I'd worked out a 6-paver pattern over the weekend, and printed up some copies for us to work from. In 5 hours we managed to lay 2 whole pallets of pavers (216 sq. ft), move some rocks in the basalt walls back and forth along paver edges, and prepare to cut a couple dozen pavers for irregular margins or where the sewer-line clean out pokes through the patio (can't cover up this important puppy).

We'll need to get some more base rock, the other half pallet of pavers (due next Monday), and form a rounded edge that parallels the rock wall that borders the patio. All in all its going pretty well, about 80% done and just in time for Octoberfest; that would be a perfect way to break it in.

PS (10/5). Tim and I finished up yesterday. We left the gravel walk out, expanded the patio to the rock wall and made cut (curved) edges on the two ends. Looks great, relatively flat and level, and nice and stable. Now we'll hose it down and continue to fill the gaps (tiny) between the pavers with fine sand. This helps to lock the pavers in place.

Thursday, September 16, 2010

Picassco I'm Not (Day 687)

September has been the month of visitors, not because of the weather here though. Its been overcast, rainy, cool, with very occasional sun breaks. Nancy's parents were here for a week breaking in the place; we must have passed as a home designed for old folks. They slept, ate, visited, and no one got hurt, fell down, or maimed. Bill did complain about the echo chamber nature of the great room, but then again he's on highly amplified hearing aids. June (Bill's wife), a self affirmed cat hater, fell in love with Maggie the cat and threatened to take her home in her luggage. We had to check before we went to the airport.

Then our sailing friends (Scott and Lynda) came up from Vegas to see what green trees look like (they need a dose of reality every few months) and sail their gorgeous 1954 Concorida yawl—Sumatra. They were here on and off for a long weekend—easy guests who are breaking in the upstairs bedroom.

While the visitors were here, I mostly primed, sanded and painted trim. Finished off the man cave windows, the guest bath room and master bath (trim), and got started on the upstairs bedroom. There are five bare wood windows and two primed doors & trim to do upstairs, so that is probably a week of painting (sand, prime, resand, and two finish coats). I should have shot this stuff with a gun, but with all the other painting finished I don't want to deal with the overspray. So every day I do a coat on a couple of windows, then I'll do the doors and trim. By then, the oak flooring will be acclimated and we'll be ready to lay it and the tile floors in the bathroom.

Not much else to report. Looks like the salt water season is over. Crabs have gone to sleep and the water/wx is getting too cool for boating, so its back to bowling for dollars and bingo. Just kidding, we're saving those adventure sports for our Golden Years (2015+).

Saturday, September 4, 2010

Crab season closes (Day 675)

Crab season closes on Monday, but we pulled our pots today. Its been the typical season. Lots of males early and lots of females later. For example, today (Sat.) I got skunked. 6 females in one pot and 5 females and a undersized male in the second pot. So even though there are 2 days left, I pulled the traps and will some R&R for the next season. For those of you that care (probably only me), I netted 42 male Dungeness and 3 male Rock crabs in two months. That is a total of about 60 pounds of crab or 7.5 pounds a week.

My total investment for two seasons is about $320 now plus two licenses at $26 total. So for simple math, we'll call it $350 invested. 16 crabs in 2009 (one trap) and 45 in 2010 for a total of 61 crabs (ca. 90 pounds of crab). So, for Ken and Colleen, my crab-crazy financial friends, that works out to $3.88 a pound, tax free. Market price is $6.50 (with tax) right now, so I figure I've made enough to pay for my gout medicine. It all works out in the end, no matter what.

I'm melting the butter right now. Cheers.

P.S. The crabby ole guy in the photo is my father-in-law who is up here to help me crab and consume. He didn't catch any, but ate some—mission accomplished.

Quarter Sawn White Oak Flooring (Day 674)

Nancy and I finally settled on flooring material for the upstairs bedroom. We'd thought of bamboo for upstairs for a long time, but decided it was too 2005. You know how building material fads come and go and decided this one had gone. Still nice material, but not as wear resistant as advertised and it only comes prefinished, with the little dust catching grooves. Could have saved some money doing bamboo, but we decided on white oak. I had laid some of this in our dining room in Denver and we liked it, so we went there again. This time I ordered quarter-sawn white oak because this cut is much more stable than regular cut oak. That's important for a floor on radiant heating.

Mills Interiors will lay the floor this fall, but I wanted to get the flooring upstairs and acclimated. The heat will go on later this month, so the timing was good for delivery. Emerson Hardwood Floors in Woodinville (NE of Seattle) was the supplier to Mills, so the flooring came by truck and ferry to our garage floor. They dropped it off when we were in Seattle shopping for bathroom tile, so I didn't want the guys carrying it through the house and up the staircase. Didn't seem like a big deal to move the wood, until I'd done a bit of it.

We have a little over 500 sq. ft of floor upstairs, so Mike Mills ordered 560 ft of flooring (3/4 x 4 SEL/BTR WO R/Q). This description decodes as 3/4" by 4" tongue and groove, select or better, white oak, rift quarter sawn. There were 34 bundles; 29 at 16 sq. ft and 5 at 20 sq. ft plus some bullnose for the stairs. Each bundle averaged 50 pounds, so how hard could that be to move. I moved a dozen to the back door, then carried each upstairs avoiding the painted walls and finished window. Careful no to make more work for myself. Then I stickered the bundles on the floor upstairs, where the radiant heat will dry the wood. The aim is to lay the wood at 6-8% moisture, then let it sit for a month before sanding and finishing it with tung oil. We really like the matt finish and ease of maintenance/repair with the tung oil.

So all the flooring is drying out and we'll have it laid toward the end of September. Then the sanding and finishing can happen a month later. We'll do the tung oil application this time to save some time and bucks. Its an easy process to mop on with a lambswool applicator, with one light sanding between the 2nd and 3rd coats. By then I should have the floor tile laid in the upstairs bath room and be starting the shower/tub tiling. I suspect I have a 4-6 weeks of full-time work upstairs before we're ready to hang cabinets, which we haven't even thought about seriously

Thursday, August 26, 2010

Tiling done, door in shower (Day 665)

Yoohah, the tiling and grouting are done on the second shower stall, which is in the guest bathroom. We need to finish it before the Harts visit next week, but it was just another (sort of major) project to get off the punch list. We'll call it the Dethloff shower for now, since they'll be the first guests to break it in. Likewise, the upstairs bedroom is being temporarily named the Dethloff loft. Go figure.

Finished the tiling last weekend, then started on the grouting. White, non-sanded grout 1/8" gaps. The box says 5 lbs will fill 12.5 square ft of 1/8" space on 6x6" tiles, which is what we probably have on average (mixture of 6"x8", 3"x6", and 2"x4" tiles). So off to Sliverdale and Home Depot to get grout on Monday. The tile covers about 100 sq ft of the shower (walls and ceiling), so the box formula indicated 8+ boxes of grout. I only bought 4 boxes (20 pounds) of grout since the formula seemed pretty whacked. Hells bells, it only took 1.5 boxes (7.5 pounds), so I don't know what idiot created the spreadage chart on the grout box. Nevertheless, the grouting is done and I have 3 boxes of grout to return to Home Depot. Total cost to grout was about $8 and another $15 to seal it all (a silicone based sealer). For the floor, I had a half box of sanded light gray grout which was just enough to finish the job.

Friday, Peninsula Shower and Tile came from Sequim to mount the door assembly. This one is relatively simple. 32.5" wide, 72" high clear-glass door, 3.8" thick. It will hinge on the left and open both in and out like the one in our master bath. Simple chrome hinges and handle; clean, attractive and easy to maintain with a squeegee. The door went in in an hour, then I grouted and sealed the floor (flat pebbles). Still have to caulk the margins of the tile and mount the shower fixtures, which include a single mixer unit (temp and pressure in one valve) and shower head, so it should go in easily (I hope). The last shower fixture job was a nightmare because I had the wrong cover for the valve, but we sorted that out in a week or so.

So, if everything goes well, we'll have the finished, entirely operable Dethloff shower done a few days before we need to use it. That's not so bad; don't even need to go to the clubhouse for showers like when we moved in last May.

Other stuff is going on when I'm tired of dealing with the shower. Nancy ordered and hung some drapes in the master bedroom (for her parents arrival). I screwed up my courage and put two Molley bolts into the gold-colored plaster wall. You only get one chance on this one, but after careful measurements I got the "Mackey table" mounted on the wall. We bought this table in Santa Fe in 2006 for our new house after admiring the one that Ned and Colleen Mackey had in their house in Denver. Four years later if looks just as good as we thought it would.

I put some of the overhead speakers in place. Had ordered them last winter, then sort of forgot about them and/or didn't want to generate any new drywall dust. However, they were using up floor space, so out came the utility knife, drywall saw, and screwdriver. The speakers in the living room went in easily, about an hour to do both. Then off to the upstairs bedroom where we had two rectangular speakers to mount high on the wall above doors. These took a bit of finagling to get them centered above the doors (studs on either side), but they came out fine. I went to mount the speakers in the downstairs den only to discover that I'd only ordered one (not a pair), so it went in and a second is in the pipeline. That leaves three to mount, 2 of which are 11 ft high in the kitchen. I'll do these when I rent the BIG folding ladder that I need to put up the hanging light fixture above the island. It goes at the peak of the ceiling, about 13 ft above the floor. So I'll need a 12 ft ladder.

I've discovered that I've fallen into a pattern of doing the easy jobs first and deferring the ugly ones. So each week I scratch some things off the list, only to find that the most onerous ones remain. The biggy is the upstairs bathroom (tile vanity and linen closet, shower and bath tile, floor tile, and toilet). At my current pace and level of enthusiasm, I suspect that this will be a winter project. No hurry, no worry.

Tuesday, August 10, 2010

12 yds of gravel, 1 to go (Day 649)

Nancy's got a paint brush back in her hand and has been knocking out some of the painted windows downstairs. Only one left to do is in the guest bathroom, but it needs primer and two coats of latex. It will probably get done as I work on the tile in there. Meanwhile, I've been working on getting all the gravel walkways around the house in place this past week, and I'm almost there. Earlier, Tim Hamm (Castlerock Landscaping) and I had built the 3 ft wide path around the south (bedroom) and east (backyard) sides of the house, but I wanted to get the remainder done before launching into the bathroom tile job. The first finished part of the walks took 2.5 yds of crushed rock (basalt, a black volcanic rock quarried locally), so Tim loaded his one ton truck up with 3 yds (7,000 pounds) of gravel and brought it over (ouch for the truck). We're using 5/8" minus, meaning everything finer than 5/8". It packs in pretty tight and makes a nice surface to walk on and will be relatively weed free.

We cleaned up the north (damp) side of the house, leveled it out, placed the bender board and Tim built two short walls against the house (photo to right). Once the landscape fabric was cut to size and nailed down, we just shoveled and wheeled gravel into the pathways. 3 yds of gravel is a bunch of gravel. But with one guy shoveling (me) and another (Tim) behind the wheel barrow we put laid it down in about 4 hrs. However, the Advil was much appreciated over the weekend. I wish I'd saved this job for Tony Crone, because he's never happier then when he's behind the business end of a shovel.


Last Friday, I had 6 more yds of gravel delivered to the driveway, and started in on the front yard paths. I made this little job last most of the weekend, but ran short by a yard. So one more trip to the Shine Quarry, and I should have all the rock in place (for now). We still haven't done anything with the backyard, which is fine for now since no one can really see it. Anyway, I have to leave something to do for next spring or summer instead of just sailing and crabbing.

P.S. Got that last yard today. Tim and I went down to the Shine Quarry, had 1 yd of 5/8" minus loaded and threw in about 50 half-man chunks for the little island near the sunroom (later in the fall). So all the gravel paths are done; the patios are next along with a large area of planting of shrubs and the lawn. Might go for a large putting green like Dr. Knott installed. Wonder if it helped his game any (probably knott).

Monday, July 26, 2010

Back to the Shower (Day 634)

I've tired of landscaping, so I'm leaving it to Bill when he arrives around Labor Day. However, it would be nice to have a second shower by then, so the press is on to get the guest bathroom shower completed. We have all the Wedi board (pan, panels and drain), so it was time to trim out the stud walls to the correct size (width and length) and make everything square. Square is the word for tiling; anything but 90° sucks, and you'll pay for it in the long run.

Yesterday I attacked the walls. Shims here & there, additional support, modified the size of the inset (for body products), and got the pan to fit. The problem with this shower is that its 3' x 4' and the drain pipe isn't centered. So the solution was to buy the standard 3' x 5' Wedi pan and cut it down to fit. No biggie, its high-density foam with a fiber mesh and cement coating. Cuts easily on the table saw. Whipped it down and the pipe is about 1 in off center, front to back. So down I went into the crawl space with my handy ABS pipe saw. Off came the trap, which is easy enough to reinstall.

After I put the pan in place with thinset mortar, I'll hook up the drain assemble to the ABS drain pipe (2") and the bottom will be done. From there, the Wedi panels go up, setting on a rabbit in the pan and butt jointed to one another up the walls. This is the same process as we used on the master bath shower (see Day 545), so no reason to dwell over it. The difference with this shower is that its smaller but has 600 pieces of tile. We're using 6"x 8" field tile, then three rows of 2"x 4" across the stall at eye level and in the inset. The floor is 11" x 11" pre-mounted flat pebbles (variegated) and the ceiling is more 6"x 8" tile. Add in a bunch of 3"x 6" bull nose for all the corners, and we're talking a sh--load of tile to be cut, placed, and grouted.

Started the tiling on the weekend (Aug. 13) and got most of the back wall and alcove finished. Worked out pretty good, but it took a lot of measuring to make everything come out balanced. Luckily the 2x4 tile works on multiples of the 6x8 field tile. I suspect I'll be cutting and tiling for at least another week. Most importantly, I need to get the door side jambs tiled so we have a final width measurement for the door. The door company won't order until this measurement is finalized, and then the door takes about 2 weeks to make, ship to Sequim and have mounted. This means we might shower with a curtain for a few days while we have visitors in early September. By then, the rear end of a shovel might be pretty appealing.

Sunday, July 25, 2010

Dirty Dirt (Day 633)

Not had much to report lately as I've been piddling along with the landscaping. All the irrigation lines are in, I've built the manifolds for the solenoids (control values), and pulled a lot of weeds that came up before our recent dry spell. Summer arrived here on July 6, lasted 5 days, then Spring came back. But Summer is here again, with temps in the high 70s, maybe even 80 by Sunday. All the locals are talking about getting AC installed—wimps.

We need to finish off the front yard, which will have an area of shrubs and flowers separated from a small lawn by a walkway. I had picked up a load (1 yd, 1500 pounds) of Magical Soil from a farmer about 5 miles south of here. Took my little "trailer that can" and had him load it up. I backed it around the house and off loaded it into an area that was low and was going to be a planter bed. No worries, mate.

The Magical Soil isn't so magical, at least to an old dirt bag (aka surficial geologist) like me. So yesterday we moved a lot of dirt around, by hand. The magical soil is about 1/3 clay and silt, 1/3 peat, and 1/3 composed manure. The farmer who blends it is running a grass-fed beef operation in Chimacum Valley, and he gets all the material right there in the valley. The valley is a 15,000-year-old glacial drainage way that flowed north to Discovery Bay. After the Puget Sound Vashion Glacier melted away, all these drainage ways were left stranded and wet, so peat deposits started to form in them. The farmer, Roger Short, says he had drilled the deposit and its 60 ft thick, although the water table is about 10 ft down in the dry season. So unless he wants to do some major water pumping, he can only mine the upper 10 ft. To make the soil, he blends composed manure (from the cows) surface soil (clay and silt) and the peat. Organic is high and it retains water pretty well. So I ordered 8 yds for delivery onto the driveway, then Tim Hamm brought another 2 yds over late in the day. I hired a local kid (young, strong) named Bison, yes like the buffalo. What were the kid's parenting thinking (or smoking). He showed up at 8 am, wheel barrow in hand, and ready to go at it. By the end of Saturday, we had moved 10 yds (15,000 pounds) of magical soil from the driveway to the front yard in two wheel barrows. Sounds like fun, yeah (4 Advil at 9 pm).

Nancy's in the hopper next. She needs to plan the magical soil plantings, and I'll do the grass. So my plan is already finished — 800 sq. of sod. So, I think the sod will go down in a few weeks and the shrub/plant install will be later, like September. Maybe Bill and June will want to help (he already said no).

Monday, July 5, 2010

The Costco Syndome (Day 613)

You know about the Costco Syndrome, right? If you see something out of the ordinary you like, you better buy it now because the next time you visit the store it will be gone.
I learned this lesson last year with some woodworking benches. They were 3' x 6', 1.5' thick maple with steel legs. Would have worked great in my garage shop, but when I returned the next week with my trailer they were all gone. Shit, screwed again by the Kirkland company.

Well, that corollary carries over to building products too. I'm not talking about plain vanilla 2x4s and the like, but other speciality items like TREX Decking. When we bought decking for our four decks and porches last fall (see Day 296), this was a "always in stock" item. No problem. 2 x 6 boards, 1/1/8" thick (5/4 x 6), and in Winchester Gray (gray). They'd sold millions of board feet: the Levi 505s of decking. So now we go to order another 72 linear feet, and the answer is that Trex has "discontinued that product." Only available as a 1" product, which won't really span 16" joists according to last year's literature. We're screwed. Either go thinner or go to a different product, which may or may not match.

Luckily, Magic Melissa at Carl's was able to round up enough of the old product for us to finish the steps for the sunroom deck. The supplier was probably happy to get rid of the last of the old Trex Accents decking that they had. Two of the boards look like bananas, with about 2" of warpiture in 12 ft. Luckily, this stuff is pretty flexible, so I can screw down the ends and bend the middle in or out to make it straight again. We have some Trex spacers that allow you to fit the boards parallel, so we'll put these in place then force the boards into a parallel configuration (with blocking) and screw them in place. We're using 3" TrapEase composite decking screws (Fastenmaster.com), which make a pilot hole and then grab the decking and screw it down to the joists. Square drive bit, makes for easy work. I'll start the decking tomorrow (Tuesday) when I have all my wits about me. If I screw up and ruin a board, then there is no replacement, so there's no reason to start his little job at the end of a holiday.

Oops. I started cutting the deck boards and noticed a little problem. The 20 ft one was going to be on the outside, with 45° miters on the corners. No problem; cut the two pieces to size than got some leftovers from the previous decks and cut the returns (pieces going back into the deck). Discovered that the 20 ft piece was a new dimension board (1" thick) so I have a mismatch on the returns and all the other pieces. At first I thought about shimming up the outer board (add 1/8" plastic shims), but this is a hokie fix. So back to Carls and Melissa. The solution is to find at least 20 ft of old Trex (1 1/8" thick) or send the "old boards" back and get all new material. She's shaking the trees, but it will take a week to ship either material to PT. Looks like this project is on hold, and its back to landscaping and garage organization.

Friday, July 2, 2010

Crab season opens (Day 610)

As you might recall from last year's blog (Day 262), the 2009 crab season in Port Townsend was a moderate success for this landlubber. Bought a dinghy with a friend, got a crab trap, and learned how to lure those little crustaceans into my trap (chicken legs of thighs work best). Total investment for 2009 was $240 and I harvested 16 crabs (ca. 24 pounds). That's $10/a pound, not as low as market price ($5-8), but approaching it considering that you can't get fresher crab. I bought a second trap setup over the winter; now my total cost is $300, so my price went up to $12.50 per pound. Time to get fishing.

Season 2 started on Thursday, July 1. The forecast is for a good season, so every one of those little buggers I catch will get my per crab price down. Another 16 crabs this year will put me at $6.25/pound and I'll be at the break-even point. Not to mention the whole process, which is priceless. After this season its all gravy, unless the boat sinks or worse. We won't go there for now.


On Thursday pm I got a total of one Dungeness crab, male about 1.5 pounds. Had to toss out a couple females and a couple under size, so it was ok but not great for two traps. My crab buddy, Hugh, has a single smaller trap and he managed to snag 5 crabs, 3 keepers. So I wasn't too pleased with my power effort. However, this Friday evening I hauled up a total of 10 crabs; 5 Dungeness and 1 Rock of legal size (total of 8.5 pounds). All of the sudden, I'm up to 7 crabs (10 pounds) for the 2-day old season and my amortized crab price is down to $8.82/pound. So far so good. Nice detraction from house projects and landscaping. Not that much will get done this holiday weekend. Sunday is the Fiddle Fest, a beach BBQ, and the PT Fireworks display. Monday, I'll be back on the deck extension, now that the Trex has arrived and is patiently awaiting getting screwed (down). More on this later. Ciao, Crabby Mike.

PS. Pulled the traps on Saturday evening and netted another 4 crabs (6 pounds). Now I'm at $300 for 40 pounds = $7.50/pound. However, I'll never equal the Steve Parker deal: 20 pounds of free Alaskan King Crab legs for free in the winter of 2006; the result of a tractor-trailer accident and the cause of many poker parties with crab legs. Remember, Ken?

PPS. Its Saturday, July 10, the end of the second week of crabbing. Total to date is 18 Dungeness and 2 Rock crabs. This is 4 more crabs than I caught all last season, so its a bountiful year. A financial update: 36 crabs (54 pounds), $300 invested, for a per pound price of $5.55. Safeway had them on sale for $5 ($5.42 w tax), so I'm about one crab from paying off my boat, traps, and line investment. Its gravy from here on.

Monday, June 28, 2010

Legos Forever (Day 604)

Tom, our son, just loved Legos when he was a kid. Still builds with them on occasion. Its just a guy thing with construction, so I had to get my own Legos. I went in for 334 of the 4"x8"x12" concrete version, to be precise. The back of the lot slopes toward the rear of the house as does the south side, so some corrective measures were in order.

I dug out a space about 3 ft wide around the the east and south sides of the house at a level about 4 " below the top of the basement vents, which are protected by curved vent wells. If water gets higher then the top of these wells, it will flow into the crawl space. By building a little (8"-16" high) retaining wall around the house, I can reverse the slope and have water flow away rather than toward the house.

The back wall is 54 ft long and the side wall is about 22 ft long, so I have 76 ft of retaining wall. On average it will need to be about 12" high, and the blocks are 4" x 12", so I ordered a mess of building blocks (gray concrete): 230 blocks and 104 caps. At 40 pounds a piece, this amounts to about 7 tons of blocks to move from the driveway area to the rear of the house. Advil.

First we put a layer of 48' wide landscape fabric down to keep weeds from growing in the pathway. Then we started with the base course of blocks. They are tapered: 12" wide at the front and 10" at the rear. So if you lay them side by side, you get a curved wall with a 36" radius. If you alternate them (12" in front, then 10" in front) you get a straight (±) wall. Pretty much like adult Legos.

Once the base course is in, its a piece of cake (a large cake admittedly) to build the remainder . Alternate rows, keep them tight and all is well. We put in some steps so we can climb out of the recessed paths, and they worked out fine. Once all the blocks and landscape fabric were laid down, the gravel was next.

We took Tim Hamm's big truck (1 Ton Chevy) to the Discovery Bay pit and had them load 2.5 tons of 5/8" minus. This means all the crushed rock that passes the 5/8" screen, so the gravel is "dirty." The fines act as a binder and make a really nice compacted base for the paths. Conversely, if you've never shoveled almost 3 tons of gravel from a pickup and wheeled it repeatedly down a path (as much as 50'), you just haven't lived. More Advil.

After this little job was done, it was time to tackle a set of steps for the sun room deck. Jim Quandt and I put the decks in last fall, but waited on these steps until the irrigation lines were in and we had a plan for the adjacent patio. The steps are 4 boards wide (23") and wrap around the deck. From here, you'll step down to the patio. Had to build a set of forms for a footer (6" wide and 4" deep with 1/2" rebar), 22 ft long. The amount of concrete for the footer is pretty trivial (3.5 cu ft), so I got 10 bags of sacrete and rented a little barrel mixer that holds 3 bags at a time. Way cheaper than getting a mobile cement mixer to deliver a single yard (27 cu ft) and figuring out what to do with the extra mud.

After the footer sets up, I bolted down a pressure-treated sill plate, extended the 2x6 joists from the deck, and will screw down a bunch of new Trex decking to match last years stuff. The only wrinkle here is the Trex company has stopped making our style decking, which is 1.1" thick. The new stuff is only 3/4", which seems pretty thin for a composite (bendy) material. Fortunately, Magic Melissa at Carls called around and found enough old style decking to do my job. If I ever have to replace any long boards, I'll have to replace all the decking in that porch with a different brand material. That sucks. Nevertheless, it should look good in a couple weeks when I finish it all up.

Thursday, June 17, 2010

Ginkgo—A theme? (Day 590)

Ginkgo, the Chinese National Tree, has taken hold in and out of our house. Nancy and I have loved this tree (and especially leaf shape) for many years. I first recall seeing it next to the library at San Jose State, were we met and both attended. That was 41 years ago (but only 29 for Nancy).

We've been looking for a theme in the house, without much success. Salmon, dragonflies, reeds, etc; something that would fit in with the Craftsman look. When we bought a small sconce for the mudroom, above Nancy's desk, we picked out one with a Ginkgo on it. Didn't give it much thought, just liked it. Then the other day at Four Corners Nursery (the Gardens at Four Corners, Port Hadlock), we picked out a few more trees and one was a darling little (5 ft) Ginkgo Bilboa. Yesterday it took root near the entrance to our house, where we can see it from the kitchen and the sun room. Looks good, and perhaps it is the second item of a theme for the house.

SO WHY IS THE GINKGO SO SPECIAL TO US. Remember, Michael is a paleogeologist, i.e., a living fossil.
(The following was abstracted from Wikipedia)

Ginkgo (Ginkgo biloba; also spelled gingko) also known as the Maidenhair Tree is a unique species of tree with no close living relatives. The ginkgo is classified in its own division, the Ginkgophyta. Other plant divisions contain hundreds of plant species, such as the conifers (division Pinophyta with 630 living species).

The genus Ginkgo is the ONLY extant species within the Ginkgophyta. It is one of the best-known examples of a living fossil, because Ginkgos other than G. biloba are not known from the fossil record after the Pliocene (2-5 million years ago). The first Gingko fossils appear in the Permian, dating back 270 Ma. (Photo is of Ginkgo biloba fossil from the Eocene, collected at MacAbee, B.C., Canada). If you are a creationist, then this fossil was put in a rock in MacAbee just to confuse everyone. Go figure.

Tuesday, June 15, 2010

Going green (Day 588)

Going green—and I mean the color—is the goal this month. The rains have let up after a wet spring (12" YTD vs 7" normally) and its time to get the rest of the plants and lawn in before it warms up too much (i.e., 80°F).

I managed to get the remainder of the polypipe in the ground for the drip and sprinkler systems, and although the basic distribution boxes are not built out yet, I could finally fill in the trenches that I dug last winter with a Ditch Witch. Most of the lines are under gravel pathways, which will make it easier to repair leaks if or when they occur.

Tim Hamm (Castle Rock Landscaping) returned for another bout of rock-wall building and helped with the pathways. We built a gravel apron off the driveway that provides a convenient place to turn cars around and allows access to the buried 500-gal propane tank in the back yard. We've been getting propane about every 3 months, typically 350 gallons at a time. As we settle into a regular heating pattern and our seasonal usage stabilizes, the fill ups become more regular: probably Sept., Dec, and April. Then I can join the 500-gal club, which is a group of Kala Point homeowners that collectively order propane based on their large volume. This typically saves about 20 cents a gallon, or $100 on a full load. But I digress, as usual. Back to the green thing.

Of the 25 trees we planted last fall/winter only one didn't make it. It was a large, clumped river birch from Secret Gardens. Sheila (the owner) was good about replacing it, but didn't have any of the same trees, so we have a store credit there. Conversely, Four Corners Nursery has a nice selection of more reasonably priced trees, so we may plug a hawthorne in the river birch's place, and pick up a couple more flowering dogwoods, which Nancy and the deer like a lot (to eat).

This week I've been hauling and spreading mulch to cover the yards and yards of unvegetated space on our lot. I can get a cubic yard of mulch—in this case composted fir bark—into my little trailer, which works out great. I can unload and spread a load, which covers about 12 sq. yards at 3" thickness, in a few hours. Pulling the weeds takes a bit longer, but hopefully the mulch will keep the weeds down. Once all the weeds are pulled and mulch laid, we'll tackle the lawn and mounded plantings that cover the septic field. This will probably take a couple more weeks (the rest of June), then I'll call Tim back to lay the flagstone patio off the sunroom. Meanwhile, we keep pecking away are our inside punch list: hanging light fixtures, trim rings on the sloped ceiling lights, ceiling and wall speakers, and unpacking in general. That should keep is off the street for most of the summer.

P.S. It looks like the visitor meter will top 10,000 by the time I post this blog. We started counting last November and hit 5,000 on March 20th (Day 500). Maybe I ought to post some ads on this thing and see if I can make a buck or too off all your eye balls.

Monday, May 31, 2010

Locks and Panes (Day 573)

We've been punching down through the list this week, mainly on small items interspersed with unpacking boxes. Took a whack at cleaning up the garage but I didn't make any headway except to extricate a trailer full of cardboard boxes and pieces. It was time to say good goodbye to the old cardboard. I had previously bought a boatload of RamBoard (1/16" high density paper) for the floors, and will use it upstairs for carpeting during the rest of our construction.

Decided it was time to get some handles on the interior doors. We'd bought about 2o Emtek Arts & Crafts lever sets for the house and they'll look great with the Craftsman theme we have going. They aren't cheap; about $60-55 a set depending on type (privacy, passage, or dummy). After I put in a couple it became pretty routine and I managed to install 10 in an 6 hr day (it was Memorial Day, so we went out to lunch).

All the doors came pre-drilled for the locks. That means they have drilled a 1" diameter hole for the locking cylinder and a 2 1/8" hole for the lever assembly. The lock sets should go right in except the door company always errs on the small side for the cover plate and striker plate. So you need to chisel it a bit deeper (a real 1/8") and sometimes larger. That makes the 15-minute install take about 45 minutes. Still, 10 down and another 10 to do in the to-be-painted doors.

I was working in the back corner of the house and Nancy causally mentioned that I was in the hall of doors. Didn't realize that the little hallway (5' x 8') has 5 doors surrounding it. Two to the stairs (up/down) one to the pantry, one outside, and one to the den. That would give Alice an anxiety attack in her little Wonderland.

Tuesday, May 25, 2010

I Love/Hate the Trees (Day 567)

The trees in this area are absolutely beautiful and abundant. We love them. But then again, they really shed a lot of leaves especially in our occasional windstorms, like last week.

I had the afternoon free and noticed that the gutters were overflowing when it rained hard. I knew the answer--they were already full of forest litter, airborne type. The gutters went on the house in Oct. of 2009, which was 7.5 months ago. Out came the big ladder, a 5-gal bucket, and a gutter scoop (hands work just as well, but that's DIRTY). We have about 220 ft of gutters and 5 down spouts. The pine needles (mostly) pile up at the downspouts and clog the gutters. Since they were installed, they've filled up to about 2/3rd full, which means they'd be full to the brim in a year. Scoped out 5-5 gal buckets and hosed out the gutters. Installed downspout filters, which just keep the needles from heading down and filling up the dry wells. Took about 3 hours to do the whole house, plus rinse off the skylights and empty the valleys, which were clogged with needles too. At this rate, I suspect that I better clean them twice a year, once in the late fall when the needles have dropped and again in the late spring when we get some pretty good rains. The pros charge $75 for cleaning, probably $100 for a house this size, so I saved enough for a really nice dinner out. I like this non-paying job.

Saturday, May 22, 2010

In Hot Water (Day 564)

The shower is grouted, the door is in, and the faucets will be connected and trimmed out in a couple of hours. (You eagle eye types will notice that I still have one f_king piece of tile to cut and mount on the upper right side). I'm heading to the showers. You'll have to trust me that it works—I'm not putting a photo of my whale carcass in the web.

Had our first dinner party last tonight (Sat.). We invited three younger couples (its all relative) from Kala Point that are friends and have watched our progress and cheered us on for the past year and a half. They're all refugees from other less desirable places, but moved here in the past few years like us.

The Wolf stove will get a burn in and the serpentine counter tops are finally seeing the light of day, clean and relatively unburdened. Its feeling like a real house now. Yea ha.

Friday, May 21, 2010

Knobs and Pulls (Day 562)

Ran out of grout boast, an additive suggested by Judy Reno (aka Vegas) at Blake Sand and Gravel in Sequim, so the Clubhouse shower saga continues into the weekend. The additive is coming by UPS today (Friday), so I'll finish the grouting on Saturday.

The great thing about building a house is that its a multitaskers dream. There is always something to do, so I opened the 60 pound box of pulls and knobs for the various cabinets in our house, which my lovely wife and purchasing agent procured via the internet (Lee Valley Hardware, Canada). Being a student of master carpenter Bill Hart, I figured that I'd make a little corner jig for the cabinet doors and rail jig for the drawers. Use the jig to drill the holes for the knobs and pulls, respectively, in the same place every time. Seemed like a no brainer, but it wasn't that simple. Spouse extraordinaire decided that the drawer pulls needed to be centered in the recessed panels, and there are six different-height panels. So I made 6 jigs for the recessed panels and just measured for the pulls on all the door corners (4" up and 1 3/8" in, see photo to right). OK, so that wasn't so hard (2 hours).

Then I had to deal with the screws for the pulls and knobs. All the knobs go through 3/4" cabinet faces, so the standard 1" screws worked fine. However, the drawers have two configurations: recessed panels @ 1 3/8" thick and non-recessed panel @ 1 5/8" thick. So, all the supplied 1" screws for the pulls were worthless. Off to Hadlock Building Supply, after a free BBQ at Carls (monthly event at Carls). Bought 1.5" 8-32 pan-head machine screws for the recessed panels, and 2" 8-32 pan-head machine screws for the non-recessed panels. Here is where the work started. In order to use the 2" screws for the 1 5/8" panels, you have to cut off 1/4", grind the end, then re-tap the screwed up screw so it will go into the pull. Add 2 hours for modifying 40 screws, and the day is pretty much gone. 8 hours of labor and I got about 30 pulls and knobs mounted. Have another dozen to do in the kitchen, a dozen in the pantry, and a dozen in the master bath (36 total) for a full days work.

So how much would your cabinet guy charge you to mount the knobs and pulls? Looks like 16 hours @ $40 for $640 plus tax for a total of $700. Add $500 for hardware, and you have instant heartburn. So Saturday looks like grouting and trim for the shower faucets (then a shower), and Sunday is more knobs and pulls.

Nancy continues to souldier along with the boxes piled everywhere in the house. At least they are in their respective rooms. By Friday the kitchen, living room and dining room were box free, and the pantry had about 50% open floor space. John Plake of Home Storage Solutions (Stor-X cabinets, Vancouver, Canada) came by on Thursday and installed our storage in the closet. Overhead poles, shelves, and pull out drawers. Quite organized, I'd say. So all the clothes and jackets are hanging up again, and I can actually find something to wear other than my usual T-shirt and mortar impregnated Dockers.

By next week, we might actually try to pull some weeds, lay some more irrigation pipe, and plant some more shrubby bushes. If it doesn't rain. Cheers at Day 562.

P.S., nice seeing you at the Safeway pitstop, Amy.

Tuesday, May 18, 2010

Finally in the house (Day 559)

Hooray, we're finally in the house. Slept there last Friday (Day 555) for the first time, and each night since then. Its great to be home again. The rental home was great, but you never felt like it was permanent. After spending the weekend and part of Monday moving, we say we'll never do it (move) again. Next time will be to the old folks home or the crematorium, neither will all our worldly good, and boy do we have them. If we hadn't built a basement in the new home, I think we'd have a long term lease on some storage space.

Still doing the shower however. Today (Tuesday) I should finish the grouting and sealing, then my part is done. Although it should be job one, other things have got in the way; like moving boxes to the basement, recycling all the old ones, plus foam peanuts, bubble pack, and packing paper. Managed to recycle almost all of it, which is a good thing. We'll unload the moving boxes on Craigslist (cheap or free, which always goes fast).

Got the internet installed (obviously), but not without several hours of phone calling. Seems like our great regional phone company—Qwest— doesn't service our subdivision for internet, although they advertise all these great services. I guess their buried phone line isn't up to snuff for internet and they're not about to lay new ones, maybe ever. Land lines are a thing of the past, everyone tells me (except when you are in a cell phone hole). So we have several internet options: Local cable company (Broadstripe, out of Michigan--not so local), Verizon and Sprint LANs (a mile from us), and satellite (Dish or Direct TV). Since I'd laid the cable line to the house, that seemed like the logical choice. I don't care for LANs (security, intermittent service, and Verizon's cells don't work at the house), and haven't heard great things about satellite access.

Broadstripe showed up in two days (Monday), hooked up a temporary line from their box to the street side of my line, made up a junction box on our service panel, installed the cable modem in my media panel, and got us on line in about 2 hours. Now I need to get a router so we can have multiple ports active. No big deal, just a trip to Best Buy. Need shorter ethernet cables and a few USB extension cords, so a trip to Silverdale is in order.

On Wednesday, Peninsula Shower and Mirror (Sequim) is coming to install our glass door for the shower. There is a panel on the left and an in-out swing door on the right, both made from 3/8" tempered glass. Each piece probably weighs 60-80 pounds, so you don't just toss them around. The panel mounts in a 1" channel and the door has two robust hinges that mount on the right side wall. We ordered rain glass (texture on outside) to match the pocket doors in the bath and the window glass in the toilet room. Should look nice when its all done; even better is that we can stop going to the clubhouse for our showers.

John Plake of Home Storage Solutions (PT) is coming Thursday to install the closet cabinets. Brian and I had built a temporary clothes hanging system in the closet which has served its purpose, so that will come down Wednesday night. Its a 2 day install, so all the clothes need to hit the floor in the living room. Unless I've missed something, this should be the last subcontractor we need on the house. We can handle everything from here on, which basically involved tiling two more showers, one bathtub, a bath floor, building some custom cabinets (in the den) and beater cabinets for the shop

This will probably be the last regular posting since we are FINALLY IN THE HOUSE. I suspect my previous estimate of 750 days to complete the house (which takes us out 6 more months--late fall) is pretty close. That is basically 2 years from ground breaking, much longer than a contractor would have taken, a bit cheaper , but not nearly as much fun & frustrating as doing it yourselves.

Best regards, Michael and Nancy Machette.
May 18, 2010.

Sunday, May 9, 2010

A tile a day keeps the movers away (Day 550)

A tile a day keeps the movers away, at least that is the way its working out. Still cutting and laying tile in the shower, but I've got the hard parts done with the drilling of holes for the shower valves. Porcelain tile is hard and brittle, so you have to be pretty careful.

I made a cardboard template for the valve placements, traced them on a tile and went at it. The bottom (temp) valve needed a triangular hole about 4" in diameter, and the top (on/off) valve needed a simple 1 1/2" hole. I bought a diamond core bit for the drill, set it up on the tile saw (as a water source) and drilled away. As long as the bit is wet it will cut like its in frozen butter. A drill press would be best in order to keep the bit from skipping across the tile, which ruined my first attempt. After I got the technique down, it was pretty straight forward. Once the corner holes were in place, I used the tile saw to cut out between the holes. To do this you lower the running saw down into the tile and cut the face side. Then turn the tile over, and do the same. If everything connects, the center part will drop out. Bingo. The single holes for the on/off valve and shower head (later) are a piece of cake.

Once these custom pieces were done, its strictly a matter of cutting and laying the remaining tile. I have about 20 (of 70) tiles to go, the upper part of the inset box, and the sill at the front. The sill will be a bit tricky in that narrow pieces are used to face the front and back, and two bull nose pieces will face the top. The seam down the middle will be hidden by the shower door, which is scheduled to go in around May 20th. So it looks like we'll be using the shower with a curtain, not door for a week, but that is no big deal. Beats showing in the sink, which Jefferson County allows by code (go figure).

Nancy caulked and grouted the marble back splash in the pantry yesterday, so that room is COMPLETELY FINISHED. That is the first room that is all done. She's already shelved about 200 of her cookbooks, with another couple hundred to go. Biggest decision here is which make the pantry list, and which get delegated to the basement.

Its Mothers Day, so we're heading out to brunch at Nemos, then up to the house in the afternoon for more tiling. Jim Quandt (Jim's Tool Time) wants his saw back, so I need to layout and cut all the remaining tile. I don't know why he needs it now, I only borrowed it in late January.

Tuesday, May 4, 2010

We'll need a shower (Day 545)

The liquid kind, not a rain storm. I'm under the gun to get tile up in the shower for the master bath, since we'll need shower facilities the day (or night) we move in. We can take them at the clubhouse, but that is a hassle. I laid the floor of the shower on Sunday afternoon, and it went well. Using the Wedi shower pan made things go quickly. With a 3' by 5' base, the drain is exactly centered. So when I laid out the 2"x2" tiles for the floor (in 1' x 1' sheets), all I had to do was cut 4 tiles (4"x4") out of the center for the drain. Piece of cake. My only complaint about the Wedi board system is that the board is not pervious, so it takes a while (like overnight) for the mortar to set up. With cement board, the moisture wicks into the board quickly so you get a fast setup (ca, 1 hour). Your best bet with Wedi is to tile in the am, then clean mortar from the gaps and wipe up excess mortar in the afternoon.

On Monday I tackled the wall tile for the shower. This is more challenging than floor tile by a long ways. In addition to keeping all tiles perfectly square, you have to keep them on the wall. Normally, the suction provided by the cement-based mortar is sufficient, until you get to an open edge, like on the inset (for shower items) or the bullnose pieces for trimming out the edges.
The key is to getting the top edge of your first line (the bottom row) of tile exactly horizontal. To do this, I used my laser level and put a line about 22 1/4" up the wall, which is about 1/4" above the second row of tiles. The tiles are 13" square, but the first row is cut down to 9" so that the top and bottom rows match. (Its a basic law in tiling that you center the tiles were possible.) So, 9" + 13" = 22". Put a line of blue masking tape around the entire shower, then used that as a horizontal base line. The bottom line had to be custom cut since there was about 1/8" fall across the back of the pan (a result of buildup of caulk in the corners). No worries, it came out fine and after the first line the spacing was set for everything from there up.

On Tuesday I tackled the alcove (recess) that is built into the wall. This is for shampoo bottles, shavers, soap, etc. I had blocked this out earlier, and just made the Wedi board wrap into and out of this space. However, it complicates matters a bunch since you need to place the tile into the alcove first (tile outward, not inward) but the seams need to align with the field tile. So you do some alcove, then some field tile, then some alcove, etc., until you get to the top of the alcove. Then you hope (and pray) that the field tile on both sides of the alcove align perfectly for the top row. We'll see about that later in the week.

Also to be done this week is the installation of the instant hot water dispenser (thanks Ann Bambrick), setting the rock countertop in the guest bath, and finishing off the low voltage electrical so we have TV, phone and internet when we move in. We've already started to move boxes into the house (basement mostly) when our son Tom was here last weekend. About 50 down and 100 to go, plus furniture, kitchen stuff, and clothing. Life is accelerating.

Blog Archive

Subcontractors and Suppliers

  • Balco Excav. (land clearing, Bill Snyder)
  • Bill McCutchen's Mill (cedar trim)
  • Blake Tile and Stone, Sequim (Judy Reno, Eldorado Stone, Tile)
  • Bob Brown Plumbing (Bob & Josh Brown)
  • Boise Cascade joists (from Carls)
  • Carl's Building Supply (Mike, Melissa, Michele, Terry & Lawrence)
  • Castlerock Landscaping (Tim Hamm, Sequim)
  • Cotton RediMix (concrete and gravel)
  • Craighead Electric (Gary Estes)
  • Custom Hearth (propane fireplaces), Pousbo
  • Daltile (Seattle, Wedi board)
  • Discount Cabinets of Washington (Sequim)
  • Discovery Bay Materials (gravel, top soil)
  • Earl Kong (professional forester, PT))
  • EcoHaus (Amer. Clay Plaster, cork flooring)
  • Ellis Construction (Gary and Troy Ellis, framing)
  • Evergreen Products (Drywall, Sequim)
  • Fergusons, Seattle (Plumbing fixtures, Bud Allen Wright)
  • FInlandia Saunas (Tigard, OR)
  • Fitzgerald Concrete (driveway, Mike Fitzgerald)
  • Four Corners Nursery (trees, Port Hadlock)
  • Frank Feltes Custom Drywall and Painting (drywall and painting)
  • Frank Ward and Wayne Jobst (Stone masons)
  • Fredricks Appliances (Redmond, all appliances)
  • Giraffe Gutters (Dan Shaw, Chimicum)
  • Glass Etchings by Perrett (Jerry Perrett)
  • Hadlock Building Supply (bits and pieces)
  • Hardiboard, siding, backer board (from Carls and Home Depot)
  • Henerys Hardware (Cabot stain, misc. fasteners)
  • Hi-Tech Electronics (Audio & Media, Port Angeles)
  • Hide-A-Hose (Joseph, A-B Vacuum, Puyallup, WA)
  • Home Depot (electrical & plumbing supplies, interior paint)
  • Home Storage Solutions (John Plake, PT)
  • Hope Roofing (Pabco Paramont Advantage shingles)
  • Jim's Tool Time (J. Quandt, misc. carpentry)
  • K&D Concrete (Don McNeese)
  • Kitchen and Bath Studio (Shelly Little, cabinets)
  • Levi's Energy Services LLC (radiant design, vents, propane piping)
  • Meta Marble and Granite (travertine), Seattle
  • Michaelangelo (sepentinite), Seattle
  • Mikael Brostrom (Structural Engineer)
  • Mills Interiors (wood flooring, some tile)
  • North Coast Electrical (Electrical Supplies)
  • Olympic Garage Doors (Sequim)
  • Penisula Flooring (carpet)
  • Penisula Shower and Mirror (Sequim)
  • PexSupply (online plumbing and radiant supplies)
  • Puget Sound Power (and Atelco installers)
  • Richard Berg Architects (Richard and Darlene)
  • Richard Gifford Construction (septic, dry wells and grading)
  • Richerts Marble and Granite (countertop fabricators)
  • Seattle Lighting (lighting fixtures)
  • Secret Gardens Nursery (Sheila Piccini)
  • Shine Quarry (basalt for landscaping)
  • Sierra Pacific Windows (Rob Sorg)
  • Simpson Doors (from Carls)
  • Simpson Strong Tie (fasteners & hold downs)
  • Stewart Excavating (Mark Stewart, foundation)
  • Sunshine Propane (propane and tank)
  • Therma-Tru Doors (from Carls)
  • Tracy's Insulation (batts and blow in)
  • Trex Decking (from Carls)
  • Trussworks (roof trusses, Carl's)
  • Velux (Skylights and Solar tubes, Carls)
  • Versalam beams (from Carls)
  • Warmboard (Bruce Hull)
  • Wisbo Aquipex, Taco Pumps, Polaris tank (Sunshine Propane)

Followers

About Me

My photo
Professional geologist (USGS, 1972-2008), amateur home remodeler and now builder. Interested in sailing, all things involving salt water, woodworking, and food in general. Owner of Paleo Seis Surveys LLC, consulting in Quaternary geology and geological hazards.