I've been on tile duty for the last week. No big deal but laying tile is like plowing a field with a horse. Slow and steady and at the end of the day maybe you have something to show for your effort. I started with the mudroom because its square (±). How hard could that be? Did I mention that I mounted the cabinets before hand, so its not square any more. Spent a day cutting the tile and a day laying it. Not too bad, about 14 hrs of labor for 150 sq ft of tile ($750). Grouting and sealing will take another 10 hrs, for a total of 24 hrs (3 days) in the mudroom. If I used the old contractor's equation of materials $ = labor $, I would be paying myself $30/hr, which is better than welfare or outta my pocket.
On Friday I cut the tile for the guest bath room, which is small and complicated. I think I'll leave this one for last to finish since I need to work in tiny little corners and corridors, and I'm not so tiny or nimble. On Saturday I cut kitchen floor tile and laid about 1/3 of it, although it was mostly just 17" x17" squares. On Sunday, Nancy had to work so without any diversions I tackled the second 1/3 of the kitchen floor, which surrounds the island. I learned an important thing that most tilers already now. "Its easier to tile beneath the island, then just set it in place."
Now being a fugal (i.e., cheap) kind of guy, I always thought it would be cheaper in terms of time and material to go around an island than beneath it. But NO is the answer. The basic problem lies in completing the circle around the island. If you've laid the tile at exactly right (90°) angles, all is well. The x and y coordinates when you come around the back corner of the island will be exactly right and your tiles will met with the required 1/8" spacing. Then again, if you're off more than 10 arc radians, you're screwed. Horizontal and vertical lines can diverge (or converge) so that when you come around the corner you have a gap or an overlap, both of which are unmitigated disasters. Don't go there.
Having given this a lot of thought (like most of Saturday's sleeping hours), I decided to beat the system. I had tiled two sides of the island, so I transferred parallel lines to the far side and projected the coordinates of intersection. A black dot went onto the Hardi backer board. Then I nailed some wooden guides onto the floor so that the tiles would end up coming out on the intersection point. I'm proud to say that the mission was accomplished within 1/32" of an inch. However, in retrospect, spending an extra $50 on the tile beneath the island would have been a lot easier, but not as satisfying.
Its Monday and another new week. Mission today is to finish the kitchen floor, then do the small bathroom on Tuesday. Then we'll need to pick a grout color and grout the entire floor, which means more time on my hands and knees. Can't wait to get past that and back into a vertical realm.
Building a House in Kala Point, Port Townsend, WA
Search This Blog
Monday, January 25, 2010
Monday, January 18, 2010
Cabin-nuts (Day 439)
All the cabinets are installed in the Pantry and Mudroom now, with the exception of some hanging cabinets in the mudroom that I can't handle myself. They went in pretty easily in retrospect, but then again I've teethed on all kitchen and bath cabinets with my mentor Brian (the trim carpenter).
The mudroom cabinets are positioned in an L shape. The two lower cabinets will be used to support an L-shaped desk made out of formica (yes, our budget is in the rice and beans class now).
Same goes for the pantry. With 25 linear ft of counter tops in the pantry, using cheapo granite @ $50 a sq. ft (from Home Depot or another Chinese rock source) would cost roughly $2500, plus another $1250 for the mudroom. Since both of these rooms have utilitarian purposes (not entertaining), we decide to use wood-trimmed formica, which has lots of new designs and colors since we bought some in 1985. At $2-3 a sq. ft its a pretty good work surface. If James Cameron or another celebrity buys our house when we go to the old folks home, they can upgrade the counters at their expense. Nancy can still have her marble slab in the baking center to roll out those famous pie crusts. I'll just leave a blank spot and find an appropriate remnant at a local fabricator. You can cut marble with a tile saw and polish it with a sander—not rocket science as I like to say.
Looks like the next project will be floor tile, which I have to man-up for. Mostly its a head job, although the 17" x 17" tiles aren't exactly light. Tile is planning and then some more planning. I'll measure out 17" from two walls and snap some chalk lines. Then I'll layout all the uncut tiles and measure up the remainders for cutting. After all the tiles are cut to size and spaced, I'll label the cut ones with tape and dry marker, stack them up in the adjacent space and go at it with my 1/4" x 1/4" trowel (and old friend now). All the books tell you to make the cuts so that you have equal size tiles on opposing walls, but with this room we'll have a desk along two walls and some sort of long bench or seat on the sauna (N) side wall. So the only "open" wall will be the one on the garage side (W), which is where I'll start using a running bond pattern.
Saturday, January 16, 2010
A river runs through it (Day 437)
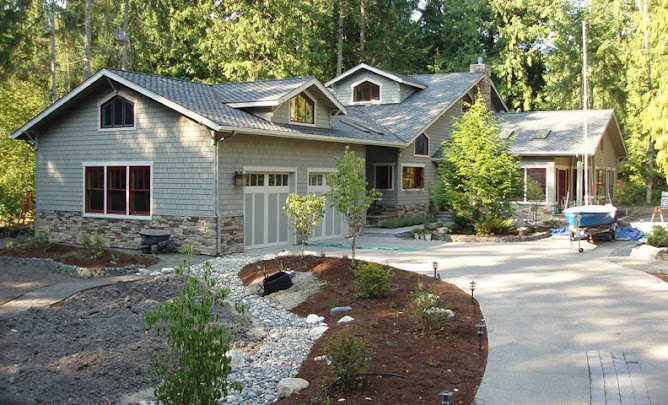
As work in the house bogs down, I can always go outside and diddle with the landscaping. Its less of a moonscape now, as the trees and scrubs start to fill in around the margins of the septic field (40' x 60' patch) in the front yard. Tim (the hardscaper) had suggested putting a little water feature in the front yard, but I've had ponds before and they are a nuisance after about two weeks. Algae, bugs, then a rank odor, so we weren't going there. However, a nice dry creek bed might look good and allow some runoff from the upper driveway to course down through the yard. We already had a bit of a berm going on the left (N) side of the driveway, so we laid out a meandering channel that we can line with plastic and cover with cobbles. Had 5 yds delivered to the ditch in front, so I can foresee a lot of wheel borrowing in the future. We've named it Kala Creek, but I'm not sure if the USGS's Board of Geographic Names is going to approve that (it might be fun to see).
Tim has finished most of the basalt rock walls for now, so we dug the creek bed and shaped the berm a bit more. In addition, we put a berm in front of the garage to break up the expansive view of it. So far, it looks pretty good. All of the trees are in the ground now, and about half of the shrubs are too. Still have to plant the Portuguese laurels as a visual break on the north side, and start laying out the paths (gravel) that will surround the house. Later in the spring (budget allowing) we'll have Tim add a flagstone patio off the sunroom and I'll build the intermediate steps out of Trex to step down off that deck.
Wednesday, January 13, 2010
Path to Front Door (Day 434)
I've been treading water while Nancy finishes painting the two windows in the Butlers Pantry (sorry no butler planned, just a space big enough for one). So I've been finishing little things and decided to put a wrap on the front path between the driveway and front (formal) entrance. I already had it graded and boxed out, so there really wasn't much to do other than lay the pavers.
I put them down in a running-bond pattern, which is relatively easy. Each row is staggered half a paver from the next (same as in the driveway median), so you need to cut some halves for the row ends. I borrowed Tool Tim Jim's big tile saw and sliced through a dozen pavers. That made the job a cinch, including the ends of the driveway median which had gone unfilled since the fall.
I also fixed our first problem with the house and we haven't even moved in it yet. I left a pressurized garden hose on the spigot on the north (cold) side of the house in December (15°F minimum) and sure enough it froze and ruptured the "freeze-proof" faucet (not to be confused with "idiot-proof faucet"). The fix was pretty easy. Cut a hole in the drywall in the garage, turn off the water, cut the Pex tubing, replace the faucet, reconnect the Pex, install access panel (for future screwups), and turn on the water. Two hours and now I have an upgrade (panel).
Tuesday, January 12, 2010
More Cabinets Arrive (Day 433)
Steve and Jeri from Discount Cabinets of Washington (Sequim) brought over the cabinets for our mudroom and pantry this morning. A sh_ _ load of large boxes showed up, but they included some fill and trim pieces. Since we'll tile underneath the mudroom cabinets, they'll have to wait a while for placement. Conversely, the floor in the pantry will be cork tiles (1' x 3' interlocking panels, EcoHaus, Portland); the cabinets go in before the cork, so we'll place these cabinets next.
Discount Cabinets of WA sells five lines of cabinets direct from their manufacturers (thanks to Craig Wallin for putting us onto them). They have a price point (and quality) to fit everyone's budget, and the upper end line (Omega) appears comparable to the Medallion cabinets we bought from the Kitchen and Bath Studio (Port Townsend) for the kitchen and bathroom. However Discount Cabinets of WA's pricing is better, perhaps about 1/3 less (apples and oranges problem with prices).
The wood shop, which had been in the pantry these past few months, is heading out to the garage. After the pantry is mucked out, we'll start by unboxing these cabinets and setting them along the outside wall. We'll mark their positions, figure what filler pieces are needed, then start screwing them together and to the walls. The overhead cabinets (two bookcase-like units) will go in second, then we'll move to the opposite wall for the laundry part of the room. I think we'll let these fester in the garage for several days, and attack them on Saturday. I have a Cooks event in Seattle on Thursday, and will need Friday to recover from our inevitable indulgences.
Saturday, January 9, 2010
Tops On, Stress Down (Day 430)
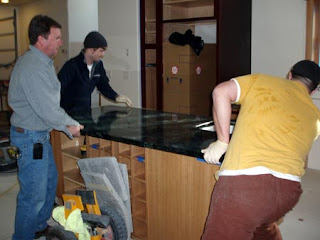
Boy, we're making real progress now. Richerts Marble and Granite showed up on Thursday with our rock counter tops and laid them in about 6 hours. This includes the kitchen perimeter counter top, the island, the master bath counter, and four sinks. One van, three guys, and a lot of heavy rock. The island top, which came in first, weighs about 250 pounds, whereas the long run for the kitchen perimeter is about 400 pounds.
As you recall from Day 279 (We own some Serpentinite), the kitchen counter tops are made from 2 slabs of Serpentinite, a high-grade metamorphic rock that looks like dark green marble but has no carbonate minerals to be etched by acids. Great choice: dense, hard and pretty with lots of veining. John Richert hadn't used this rock before and said it cut well, although the slabs were just barely large enough for the counter tops. At only 58"-60" wide, he had to cut two widths of 29" from one slab. No room for error, and in fact one of the pieces uses the factory edge along the wall (to be covered by a back splash).
The install went well, but they had to fiddle with the opening for the Wolf range top. The factory specified a 36" opening for the range top, which we allowed for but when they got ready to drop it in (before setting the stone), it was 1/16" oversize. Well, rock isn't flexible and both ends of the slab were pinned in (wall on one side, oven cabinet on the other). So they ground a bit of a wood filler piece down, and took some off the back (offending) edge of a trim piece on the Wolf and then it fit. Woosh.
It was interesting to watch the process of gluing the two counter pieces together. The seam is in the corner of the L. They mixed up some black polyepoxy and slathered it along the to-be-joined edge. Then they attached two suction pads, one on either side of the seam. The pads are attached to each other by rods that draw the pads together. On came the vacuum pump, and the two slabs were drawn together while the glue set up. Two hours later, they pulled off the suction pads, scraped off the excess epoxy and polished up the finished counter. Beautiful job.
I asked why they predrilled the holes for the faucets from the bottomside, but not all the way through. John said that this way they can set the counters, then knock the hole out from the top. This prevents a breakout (mushrooming) on the bottom side and leaves a slightly smaller hole on the top.
The bathroom tops were pretty straight forward and smaller, so the install there was simple by comparison. These are made of travertine, a limestone material that it riddled with small holes that are filled in before the surface is polished up. The travertine is solidified spring deposits (calcium carbonate), and is classified as a type of limestone. The holes are the result of organic matter (plants, bugs, etc) that is trapped in the spring deposits, then decomposes leaving voids. Much like the gas bubbles in volcanic rocks. Travertine is easy to cut and was used extensively by ancient Romans for baths and floors. In modern times, travertine is cut with metal wire saws in 2 or 3 cm thick slabs, then polished with a grit made from quartz (hardness of 7). Since the travertince is so soft (hardness of 3) and susceptible to acids, its best for bathroom applications, not kitchens where acids abound (vinegar, wine, lemon, tomato, etc).
I was mostly a spectator during the counter top installation, but was anxious all day to see the end result. When it was all done and they'd gone back to Sequimville, it felt like a great burden was removed from our shoulders and the whole building process. The kitchen and bath appear largely done, except for placing the tile floor and installing the remaining appliances. As a result, we decided that the Serpentinite needed to be inaugurated. We invited some Kala Point friends (that have keenly watched our project) over for some wine and cheese, so the first party in our new kitchen is under our belts. Now its time to get onto the tiling project.
Wednesday, January 6, 2010
The glass counter top (Day 427)
For the past year we've been struggling with a glass bar top that will go on the island. The idea is to have a 16" x 60" slab of 3/4" plate glass floating off the edge of the island to use as a stand-up bar (coffee) or eating area (with bar stools).
Nancy and I've spent hours on the internet looking for standoffs—metal brackets—that will hold up the glass bar. Most are made to support the glass legs of a table do, but not to be cantilevered. So after a long struggle with this, I starting drawing plans for some standoffs and went to see several metal fabricators in PT. Luckily I found a good guy at Peter's Marine that can do the job and make a nice looking bracket (see drawing). We'll need four to do the job, but its a nice solution to the problem.
The glass bar top will be made by Jerry Perrett, a local artist we met on the 2008 Art Studio Tour and several art shows. We've fallen in love with his etched art, which uses a technique of deep-sculpted sandblasted 3/4" thick glass with their visible trademark of the free form broken edge. We had made etched glass for the Denver house years ago, and still like it. Take a look at his work at glassetchingsbyperrett.com. The only problem here is deciding (once again) on a design theme that will tie into other parts of the house. We'll fight that battle when its time to order the bar top this spring.
Picking Tile Colors (Day 426)
Back in mid December, after seeing Santa Baby in Seattle with the Murphys, Nancy and I spent the next day looking at tile for the house. We need floor tile for the kitchen, mudroom, guest bath, master bath, and (later) for the upstairs bathroom. We also need wall tile for the showers and upstairs bath (later), and back splash tile for the master bath vanity and kitchen. Picking out tile (for at least me) is just slightly more pleasant than jambing a toothpick beneath your fingernail. It can also lead to divorce court or a session with Judge Judy. You get the point.
We came back with a half dozen samples of rather boring, utilitarian tile that wasn't even affordable ($10-30/sq.ft). So for 3 weeks, we've ignored the looming problem. However, we're at a point where the tile needs to go down. The trim on a half dozen doors can't be nailed up until the tile is laid, so that's holding up some paint and lacquer work. Luckily, a design angel came to our aid—True Heart, a local artist and current home builder with her husband Dennis McDaniels. We'd met them several years ago on the PT Art Studio Tour, then became friends as we shared stories about building our houses. I put them onto Brian Van Dalsam, who is working more for them now than for us (they have hundreds of board feet of trim lumber to sand, stain, and finish—yikes). Anyway, I digress.
True offered to help us, really Nancy, pick out tile colors. I'm outta the loop on this one since I can't pick out a tie to go with pants and a shirt. She said it would be easy once we decided on the core colors, then narrowed our choices down to tiles that pull those colors in. The basic idea that we failed to grasp was that we need to build an integrated palette of colors for the house based on several key colors and/or themes. For example, she said that the greens in the counter top ought to get picked up in the walls and tile, if possible. The long kitchen wall was easy since American clay had two colors that went with the lighter green veins in the counter top. The floor tile was harder, but success was on the horizon. Yesterday, True and Nancy went off to Sequim to a tile supplier (Blake Sand and Gravel) to look at samples, plus shop at Costco and look in on the counter tops which were being fabricated by Richerts in Carlsborg (just west of Sequim).
Well, in a matter of several hours they'd found a line of porcelain tile that had variegated colors with some hints of red (the kitchen cabinets) and greens (the counter tops and clay plaster walls to be). VoilĂ . She brought home some samples and I liked them all. We've joked with True that we'll trade meals for design ideas, so it looks like the new kitchen will get well used and soon. In fact, we made a down payment by having them to dinner last weekend. The tile samples have to go back on Saturday, so we'll pick out the floor tile and put an order in. Looks like we'll be laying about 500 sq. ft of tile by the end of the month.
Monday, January 4, 2010
Interior Doors (Day 425)
This weekend, Brian (my right-hand man now) and I took a whack at hanging the interior doors for the house. First chore was to figure out what door went where, but after some shuffling we got them in the right spots. A couple surprises though. One of exterior-type doors (air tight) for the staircase was hinged to open the wrong way (our fault, didn't catch it on the order) as well as the door to the upstairs bathroom. Seems like we went over this list a dozen times with Melissa at Carl's. Anyway, we'll use the exterior door at the top of the staircase, where we were waiting to see if we needed one (yes). For the bathroom door, we can order a frame only and still use the glass door. In addition, we still need a door for the basement utility room and a door for the mudroom coat closet, which I added at the expense of an overly large sauna just before drywall went in, and after our original door order (May). In addition, the master bedroom door came with a flawed door stop on the frame (one piece) so it has to be returned to Carls and reordered.
Anyway, Brian and I hung 6 doors on Saturday (one per hour) and another 4 on Sunday, which included two glass doors (pantry and guest bath). Hanging doors isn't rocket science (thank god), but you have to be careful to get them square and level so they look good and aren't self closers (ghost doors). Typically, we started by tack nailing the hinge jamb to the opening, then leveling it vertically with shims. Then we squared up the door by closing it and checking the reveal (space) between the door and the jambs (header and sides). If this looked good, we shimmed up the other jamb (non-hinge side), and shot a couple of 2" nails to secure it. Then we'd nail the jambs at the hinges with 12 penny (2.5" nails) and replace one of the screws on each hinge with a long square drive (3") screw that goes all the way into the framing, thus securing the door and allowing for some further adjustment (via the long screw). Finally, we'd nail off the non-hinge jamb, set all the nails and putty her up.
After all this was done, we removed the glass doors and stored them in a safe place. We're done with doors for now; still have to hang 6 more when we get all the right parts. After lunch, we knocked out the Hardi backer board for the upstairs bathroom. I had all the material, but wasn't anxious to get down on my hands and knees and screw this stuff down. So, I mixed and spread the cement and Brian did the screwing. More appropriate task for him—he isn't 40 yet and can still get up and down without too much groaning.
We got an unexpected call from our counter-top installer on Sunday am. I thought it was the Church pastor calling, but we got lucky instead. John Richert from Sequim called and said he had a job crater that was scheduled for next week and needed to find something to do for his guys in the shop on Monday. So since all the kitchen and master bath cabinets were set, he came over and measured for the counters. In the old days (like the 20th century), the fabricator would come over with thin strips of wood and a hot glue gun and make templates for the tops. Now days, they use a laser device that sits on the counter or island. After it gets leveled (automatically), the operator takes a stylus out of pivoting arm and pulls it to various points on the cabinet top. (For Tony, this is basically a variety of laser theodolite.) The machine measures all three dimensions (vertical, E, N) for each point, then creates a map of the counter top. Then you drop the sinks in their correct locations and map them out. In about an hour, John had the L-shaped perimeter counter top mapped out, then did the island with a tape measure (its a simple rectangle with 1.5" overhang), and moved into the bathroom. This counter top is a three piece job, so he did it the old way but used firm plastic strips (not wood) and an acetate super glue. Fast, clean, and permanent. He says they'll cut the slabs early this next week, and do the install later in the week. If all goes well, we'll have counters by Friday (Jan. 8th). Woosh.
Subscribe to:
Posts (Atom)
Subcontractors and Suppliers
- Balco Excav. (land clearing, Bill Snyder)
- Bill McCutchen's Mill (cedar trim)
- Blake Tile and Stone, Sequim (Judy Reno, Eldorado Stone, Tile)
- Bob Brown Plumbing (Bob & Josh Brown)
- Boise Cascade joists (from Carls)
- Carl's Building Supply (Mike, Melissa, Michele, Terry & Lawrence)
- Castlerock Landscaping (Tim Hamm, Sequim)
- Cotton RediMix (concrete and gravel)
- Craighead Electric (Gary Estes)
- Custom Hearth (propane fireplaces), Pousbo
- Daltile (Seattle, Wedi board)
- Discount Cabinets of Washington (Sequim)
- Discovery Bay Materials (gravel, top soil)
- Earl Kong (professional forester, PT))
- EcoHaus (Amer. Clay Plaster, cork flooring)
- Ellis Construction (Gary and Troy Ellis, framing)
- Evergreen Products (Drywall, Sequim)
- Fergusons, Seattle (Plumbing fixtures, Bud Allen Wright)
- FInlandia Saunas (Tigard, OR)
- Fitzgerald Concrete (driveway, Mike Fitzgerald)
- Four Corners Nursery (trees, Port Hadlock)
- Frank Feltes Custom Drywall and Painting (drywall and painting)
- Frank Ward and Wayne Jobst (Stone masons)
- Fredricks Appliances (Redmond, all appliances)
- Giraffe Gutters (Dan Shaw, Chimicum)
- Glass Etchings by Perrett (Jerry Perrett)
- Hadlock Building Supply (bits and pieces)
- Hardiboard, siding, backer board (from Carls and Home Depot)
- Henerys Hardware (Cabot stain, misc. fasteners)
- Hi-Tech Electronics (Audio & Media, Port Angeles)
- Hide-A-Hose (Joseph, A-B Vacuum, Puyallup, WA)
- Home Depot (electrical & plumbing supplies, interior paint)
- Home Storage Solutions (John Plake, PT)
- Hope Roofing (Pabco Paramont Advantage shingles)
- Jim's Tool Time (J. Quandt, misc. carpentry)
- K&D Concrete (Don McNeese)
- Kitchen and Bath Studio (Shelly Little, cabinets)
- Levi's Energy Services LLC (radiant design, vents, propane piping)
- Meta Marble and Granite (travertine), Seattle
- Michaelangelo (sepentinite), Seattle
- Mikael Brostrom (Structural Engineer)
- Mills Interiors (wood flooring, some tile)
- North Coast Electrical (Electrical Supplies)
- Olympic Garage Doors (Sequim)
- Penisula Flooring (carpet)
- Penisula Shower and Mirror (Sequim)
- PexSupply (online plumbing and radiant supplies)
- Puget Sound Power (and Atelco installers)
- Richard Berg Architects (Richard and Darlene)
- Richard Gifford Construction (septic, dry wells and grading)
- Richerts Marble and Granite (countertop fabricators)
- Seattle Lighting (lighting fixtures)
- Secret Gardens Nursery (Sheila Piccini)
- Shine Quarry (basalt for landscaping)
- Sierra Pacific Windows (Rob Sorg)
- Simpson Doors (from Carls)
- Simpson Strong Tie (fasteners & hold downs)
- Stewart Excavating (Mark Stewart, foundation)
- Sunshine Propane (propane and tank)
- Therma-Tru Doors (from Carls)
- Tracy's Insulation (batts and blow in)
- Trex Decking (from Carls)
- Trussworks (roof trusses, Carl's)
- Velux (Skylights and Solar tubes, Carls)
- Versalam beams (from Carls)
- Warmboard (Bruce Hull)
- Wisbo Aquipex, Taco Pumps, Polaris tank (Sunshine Propane)
Followers
About Me
- Kala Point Builder
- Professional geologist (USGS, 1972-2008), amateur home remodeler and now builder. Interested in sailing, all things involving salt water, woodworking, and food in general. Owner of Paleo Seis Surveys LLC, consulting in Quaternary geology and geological hazards.