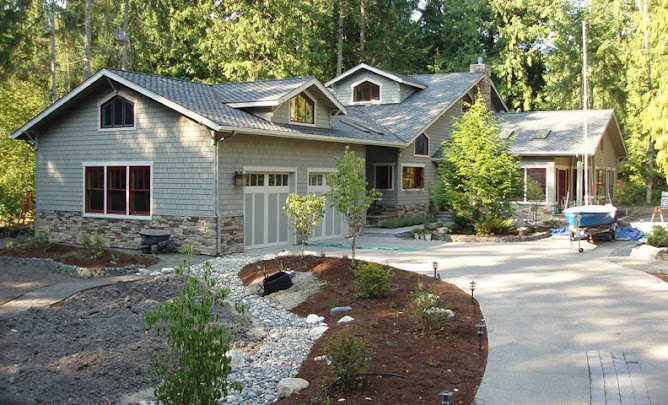
We've been punching down through the list this week, mainly on small items interspersed with unpacking boxes. Took a whack at cleaning up the garage but I didn't make any headway except to extricate a trailer full of cardboard boxes and pieces. It was time to say good goodbye to the old cardboard. I had previously bought a boatload of RamBoard (1/16" high density paper) for the floors, and will use it upstairs for carpeting during the rest of our construction.
Decided it was time to get some handles on the interior doors. We'd bought about 2o Emtek Arts & Crafts lever sets for the house and they'll look great with the Craftsman theme we have going. They aren't cheap; about $60-55 a set depending on type (privacy, passage, or dummy). After I put in a couple it became pretty routine and I managed to install 10 in an 6 hr day (it was Memorial Day, so we went out to lunch).
All the doors came pre-drilled for the locks. That means they have drilled a 1" diameter hole for the locking cylinder and a 2 1/8" hole for the lever assembly. The lock sets should go right in except the door company always errs on the small side for the cover plate and striker plate. So you need to chisel it a bit deeper (a real 1/8") and sometimes larger. That makes the 15-minute install take about 45 minutes. Still, 10 down and another 10 to do in the to-be-painted doors.
I was working in the back corner of the house and Nancy causally mentioned that I was in the hall of doors. Didn't realize that the little hallway (5' x 8') has 5 doors surrounding it. Two to the stairs (up/down) one to the pantry, one outside, and one to the den. That would give Alice an anxiety attack in her little Wonderland.
Building a House in Kala Point, Port Townsend, WA
Search This Blog
Monday, May 31, 2010
Tuesday, May 25, 2010
I Love/Hate the Trees (Day 567)
The trees in this area are absolutely beautiful and abundant. We love them. But then again, they really shed a lot of leaves especially in our occasional windstorms, like last week.
I had the afternoon free and noticed that the gutters were overflowing when it rained hard. I knew the answer--they were already full of forest litter, airborne type. The gutters went on the house in Oct. of 2009, which was 7.5 months ago. Out came the big ladder, a 5-gal bucket, and a gutter scoop (hands work just as well, but that's DIRTY). We have about 220 ft of gutters and 5 down spouts. The pine needles (mostly) pile up at the downspouts and clog the gutters. Since they were installed, they've filled up to about 2/3rd full, which means they'd be full to the brim in a year. Scoped out 5-5 gal buckets and hosed out the gutters. Installed downspout filters, which just keep the needles from heading down and filling up the dry wells. Took about 3 hours to do the whole house, plus rinse off the skylights and empty the valleys, which were clogged with needles too. At this rate, I suspect that I better clean them twice a year, once in the late fall when the needles have dropped and again in the late spring when we get some pretty good rains. The pros charge $75 for cleaning, probably $100 for a house this size, so I saved enough for a really nice dinner out. I like this non-paying job.
Saturday, May 22, 2010
In Hot Water (Day 564)
The shower is grouted, the door is in, and the faucets will be connected and trimmed out in a couple of hours. (You eagle eye types will notice that I still have one f_king piece of tile to cut and mount on the upper right side). I'm heading to the showers. You'll have to trust me that it works—I'm not putting a photo of my whale carcass in the web.
Had our first dinner party last tonight (Sat.). We invited three younger couples (its all relative) from Kala Point that are friends and have watched our progress and cheered us on for the past year and a half. They're all refugees from other less desirable places, but moved here in the past few years like us.
The Wolf stove will get a burn in and the serpentine counter tops are finally seeing the light of day, clean and relatively unburdened. Its feeling like a real house now. Yea ha.
Friday, May 21, 2010
Knobs and Pulls (Day 562)
Ran out of grout boast, an additive suggested by Judy Reno (aka Vegas) at Blake Sand and Gravel in Sequim, so the Clubhouse shower saga continues into the weekend. The additive is coming by UPS today (Friday), so I'll finish the grouting on Saturday.
The great thing about building a house is that its a multitaskers dream. There is always something to do, so I opened the 60 pound box of pulls and knobs for the various cabinets in our house, which my lovely wife and purchasing agent procured via the internet (Lee Valley Hardware, Canada). Being a student of master carpenter Bill Hart, I figured that I'd make a little corner jig for the cabinet doors and rail jig for the drawers. Use the jig to drill the holes for the knobs and pulls, respectively, in the same place every time. Seemed like a no brainer, but it wasn't that simple. Spouse extraordinaire decided that the drawer pulls needed to be centered in the recessed panels, and there are six different-height panels. So I made 6 jigs for the recessed panels and just measured for the pulls on all the door corners (4" up and 1 3/8" in, see photo to right). OK, so that wasn't so hard (2 hours).
Then I had to deal with the screws for the pulls and knobs. All the knobs go through 3/4" cabinet faces, so the standard 1" screws worked fine. However, the drawers have two configurations: recessed panels @ 1 3/8" thick and non-recessed panel @ 1 5/8" thick. So, all the supplied 1" screws for the pulls were worthless. Off to Hadlock Building Supply, after a free BBQ at Carls (monthly event at Carls). Bought 1.5" 8-32 pan-head machine screws for the recessed panels, and 2" 8-32 pan-head machine screws for the non-recessed panels. Here is where the work started. In order to use the 2" screws for the 1 5/8" panels, you have to cut off 1/4", grind the end, then re-tap the screwed up screw so it will go into the pull. Add 2 hours for modifying 40 screws, and the day is pretty much gone. 8 hours of labor and I got about 30 pulls and knobs mounted. Have another dozen to do in the kitchen, a dozen in the pantry, and a dozen in the master bath (36 total) for a full days work.
So how much would your cabinet guy charge you to mount the knobs and pulls? Looks like 16 hours @ $40 for $640 plus tax for a total of $700. Add $500 for hardware, and you have instant heartburn. So Saturday looks like grouting and trim for the shower faucets (then a shower), and Sunday is more knobs and pulls.
Nancy continues to souldier along with the boxes piled everywhere in the house. At least they are in their respective rooms. By Friday the kitchen, living room and dining room were box free, and the pantry had about 50% open floor space. John Plake of Home Storage Solutions (Stor-X cabinets, Vancouver, Canada) came by on Thursday and installed our storage in the closet. Overhead poles, shelves, and pull out drawers. Quite organized, I'd say. So all the clothes and jackets are hanging up again, and I can actually find something to wear other than my usual T-shirt and mortar impregnated Dockers.
By next week, we might actually try to pull some weeds, lay some more irrigation pipe, and plant some more shrubby bushes. If it doesn't rain. Cheers at Day 562.
P.S., nice seeing you at the Safeway pitstop, Amy.
Tuesday, May 18, 2010
Finally in the house (Day 559)
Hooray, we're finally in the house. Slept there last Friday (Day 555) for the first time, and each night since then. Its great to be home again. The rental home was great, but you never felt like it was permanent. After spending the weekend and part of Monday moving, we say we'll never do it (move) again. Next time will be to the old folks home or the crematorium, neither will all our worldly good, and boy do we have them. If we hadn't built a basement in the new home, I think we'd have a long term lease on some storage space.
Still doing the shower however. Today (Tuesday) I should finish the grouting and sealing, then my part is done. Although it should be job one, other things have got in the way; like moving boxes to the basement, recycling all the old ones, plus foam peanuts, bubble pack, and packing paper. Managed to recycle almost all of it, which is a good thing. We'll unload the moving boxes on Craigslist (cheap or free, which always goes fast).
Got the internet installed (obviously), but not without several hours of phone calling. Seems like our great regional phone company—Qwest— doesn't service our subdivision for internet, although they advertise all these great services. I guess their buried phone line isn't up to snuff for internet and they're not about to lay new ones, maybe ever. Land lines are a thing of the past, everyone tells me (except when you are in a cell phone hole). So we have several internet options: Local cable company (Broadstripe, out of Michigan--not so local), Verizon and Sprint LANs (a mile from us), and satellite (Dish or Direct TV). Since I'd laid the cable line to the house, that seemed like the logical choice. I don't care for LANs (security, intermittent service, and Verizon's cells don't work at the house), and haven't heard great things about satellite access.
Broadstripe showed up in two days (Monday), hooked up a temporary line from their box to the street side of my line, made up a junction box on our service panel, installed the cable modem in my media panel, and got us on line in about 2 hours. Now I need to get a router so we can have multiple ports active. No big deal, just a trip to Best Buy. Need shorter ethernet cables and a few USB extension cords, so a trip to Silverdale is in order.
On Wednesday, Peninsula Shower and Mirror (Sequim) is coming to install our glass door for the shower. There is a panel on the left and an in-out swing door on the right, both made from 3/8" tempered glass. Each piece probably weighs 60-80 pounds, so you don't just toss them around. The panel mounts in a 1" channel and the door has two robust hinges that mount on the right side wall. We ordered rain glass (texture on outside) to match the pocket doors in the bath and the window glass in the toilet room. Should look nice when its all done; even better is that we can stop going to the clubhouse for our showers.
John Plake of Home Storage Solutions (PT) is coming Thursday to install the closet cabinets. Brian and I had built a temporary clothes hanging system in the closet which has served its purpose, so that will come down Wednesday night. Its a 2 day install, so all the clothes need to hit the floor in the living room. Unless I've missed something, this should be the last subcontractor we need on the house. We can handle everything from here on, which basically involved tiling two more showers, one bathtub, a bath floor, building some custom cabinets (in the den) and beater cabinets for the shop
This will probably be the last regular posting since we are FINALLY IN THE HOUSE. I suspect my previous estimate of 750 days to complete the house (which takes us out 6 more months--late fall) is pretty close. That is basically 2 years from ground breaking, much longer than a contractor would have taken, a bit cheaper , but not nearly as much fun & frustrating as doing it yourselves.
Best regards, Michael and Nancy Machette.
May 18, 2010.
Sunday, May 9, 2010
A tile a day keeps the movers away (Day 550)
A tile a day keeps the movers away, at least that is the way its working out. Still cutting and laying tile in the shower, but I've got the hard parts done with the drilling of holes for the shower valves. Porcelain tile is hard and brittle, so you have to be pretty careful.
I made a cardboard template for the valve placements, traced them on a tile and went at it. The bottom (temp) valve needed a triangular hole about 4" in diameter, and the top (on/off) valve needed a simple 1 1/2" hole. I bought a diamond core bit for the drill, set it up on the tile saw (as a water source) and drilled away. As long as the bit is wet it will cut like its in frozen butter. A drill press would be best in order to keep the bit from skipping across the tile, which ruined my first attempt. After I got the technique down, it was pretty straight forward. Once the corner holes were in place, I used the tile saw to cut out between the holes. To do this you lower the running saw down into the tile and cut the face side. Then turn the tile over, and do the same. If everything connects, the center part will drop out. Bingo. The single holes for the on/off valve and shower head (later) are a piece of cake.
Once these custom pieces were done, its strictly a matter of cutting and laying the remaining tile. I have about 20 (of 70) tiles to go, the upper part of the inset box, and the sill at the front. The sill will be a bit tricky in that narrow pieces are used to face the front and back, and two bull nose pieces will face the top. The seam down the middle will be hidden by the shower door, which is scheduled to go in around May 20th. So it looks like we'll be using the shower with a curtain, not door for a week, but that is no big deal. Beats showing in the sink, which Jefferson County allows by code (go figure).
Nancy caulked and grouted the marble back splash in the pantry yesterday, so that room is COMPLETELY FINISHED. That is the first room that is all done. She's already shelved about 200 of her cookbooks, with another couple hundred to go. Biggest decision here is which make the pantry list, and which get delegated to the basement.
Its Mothers Day, so we're heading out to brunch at Nemos, then up to the house in the afternoon for more tiling. Jim Quandt (Jim's Tool Time) wants his saw back, so I need to layout and cut all the remaining tile. I don't know why he needs it now, I only borrowed it in late January.
Tuesday, May 4, 2010
We'll need a shower (Day 545)
The liquid kind, not a rain storm. I'm under the gun to get tile up in the shower for the master bath, since we'll need shower facilities the day (or night) we move in. We can take them at the clubhouse, but that is a hassle. I laid the floor of the shower on Sunday afternoon, and it went well. Using the Wedi shower pan made things go quickly. With a 3' by 5' base, the drain is exactly centered. So when I laid out the 2"x2" tiles for the floor (in 1' x 1' sheets), all I had to do was cut 4 tiles (4"x4") out of the center for the drain. Piece of cake. My only complaint about the Wedi board system is that the board is not pervious, so it takes a while (like overnight) for the mortar to set up. With cement board, the moisture wicks into the board quickly so you get a fast setup (ca, 1 hour). Your best bet with Wedi is to tile in the am, then clean mortar from the gaps and wipe up excess mortar in the afternoon.
On Monday I tackled the wall tile for the shower. This is more challenging than floor tile by a long ways. In addition to keeping all tiles perfectly square, you have to keep them on the wall. Normally, the suction provided by the cement-based mortar is sufficient, until you get to an open edge, like on the inset (for shower items) or the bullnose pieces for trimming out the edges.
The key is to getting the top edge of your first line (the bottom row) of tile exactly horizontal. To do this, I used my laser level and put a line about 22 1/4" up the wall, which is about 1/4" above the second row of tiles. The tiles are 13" square, but the first row is cut down to 9" so that the top and bottom rows match. (Its a basic law in tiling that you center the tiles were possible.) So, 9" + 13" = 22". Put a line of blue masking tape around the entire shower, then used that as a horizontal base line. The bottom line had to be custom cut since there was about 1/8" fall across the back of the pan (a result of buildup of caulk in the corners). No worries, it came out fine and after the first line the spacing was set for everything from there up.
On Tuesday I tackled the alcove (recess) that is built into the wall. This is for shampoo bottles, shavers, soap, etc. I had blocked this out earlier, and just made the Wedi board wrap into and out of this space. However, it complicates matters a bunch since you need to place the tile into the alcove first (tile outward, not inward) but the seams need to align with the field tile. So you do some alcove, then some field tile, then some alcove, etc., until you get to the top of the alcove. Then you hope (and pray) that the field tile on both sides of the alcove align perfectly for the top row. We'll see about that later in the week.
Also to be done this week is the installation of the instant hot water dispenser (thanks Ann Bambrick), setting the rock countertop in the guest bath, and finishing off the low voltage electrical so we have TV, phone and internet when we move in. We've already started to move boxes into the house (basement mostly) when our son Tom was here last weekend. About 50 down and 100 to go, plus furniture, kitchen stuff, and clothing. Life is accelerating.
Sunday, May 2, 2010
First Pie outta the Oven (Day 543)
Taking the weekend off because our son Tom and his girlfriend Jenn are in town for a visit. Its his 25th birthday soon and an opportunity to get together, since they live in South Dakota, 1500 miles to the east of us.We took in the Opening Day Boating ceremonies for Port Townsend and saw a nice boat parade with spirited winds in the afternoon. That night, Nancy constructed one of her near famous apple pies (too bad Mr. Bill) and we christened the Wolf double oven. 425°F for an hour and perfectly done. She's happy, so I'm happy.
Not much more to report, except we only have 14 days left before we move in. YIKES. Got to get moving on tiling the shower in the master bath, finishing baseboard trim, and painting windows in the master bedroom so we can make a place to sleep and wash up. We'll start slowly moving some of the 150 unopened boxes from the Denver move into the basement of the new house, then deal with the big furniture, the kitchen equipment, and clothes as we get closer to the deadline. Hopefully this will be our last move until the mortician shows up at the front door.
Subscribe to:
Posts (Atom)
Subcontractors and Suppliers
- Balco Excav. (land clearing, Bill Snyder)
- Bill McCutchen's Mill (cedar trim)
- Blake Tile and Stone, Sequim (Judy Reno, Eldorado Stone, Tile)
- Bob Brown Plumbing (Bob & Josh Brown)
- Boise Cascade joists (from Carls)
- Carl's Building Supply (Mike, Melissa, Michele, Terry & Lawrence)
- Castlerock Landscaping (Tim Hamm, Sequim)
- Cotton RediMix (concrete and gravel)
- Craighead Electric (Gary Estes)
- Custom Hearth (propane fireplaces), Pousbo
- Daltile (Seattle, Wedi board)
- Discount Cabinets of Washington (Sequim)
- Discovery Bay Materials (gravel, top soil)
- Earl Kong (professional forester, PT))
- EcoHaus (Amer. Clay Plaster, cork flooring)
- Ellis Construction (Gary and Troy Ellis, framing)
- Evergreen Products (Drywall, Sequim)
- Fergusons, Seattle (Plumbing fixtures, Bud Allen Wright)
- FInlandia Saunas (Tigard, OR)
- Fitzgerald Concrete (driveway, Mike Fitzgerald)
- Four Corners Nursery (trees, Port Hadlock)
- Frank Feltes Custom Drywall and Painting (drywall and painting)
- Frank Ward and Wayne Jobst (Stone masons)
- Fredricks Appliances (Redmond, all appliances)
- Giraffe Gutters (Dan Shaw, Chimicum)
- Glass Etchings by Perrett (Jerry Perrett)
- Hadlock Building Supply (bits and pieces)
- Hardiboard, siding, backer board (from Carls and Home Depot)
- Henerys Hardware (Cabot stain, misc. fasteners)
- Hi-Tech Electronics (Audio & Media, Port Angeles)
- Hide-A-Hose (Joseph, A-B Vacuum, Puyallup, WA)
- Home Depot (electrical & plumbing supplies, interior paint)
- Home Storage Solutions (John Plake, PT)
- Hope Roofing (Pabco Paramont Advantage shingles)
- Jim's Tool Time (J. Quandt, misc. carpentry)
- K&D Concrete (Don McNeese)
- Kitchen and Bath Studio (Shelly Little, cabinets)
- Levi's Energy Services LLC (radiant design, vents, propane piping)
- Meta Marble and Granite (travertine), Seattle
- Michaelangelo (sepentinite), Seattle
- Mikael Brostrom (Structural Engineer)
- Mills Interiors (wood flooring, some tile)
- North Coast Electrical (Electrical Supplies)
- Olympic Garage Doors (Sequim)
- Penisula Flooring (carpet)
- Penisula Shower and Mirror (Sequim)
- PexSupply (online plumbing and radiant supplies)
- Puget Sound Power (and Atelco installers)
- Richard Berg Architects (Richard and Darlene)
- Richard Gifford Construction (septic, dry wells and grading)
- Richerts Marble and Granite (countertop fabricators)
- Seattle Lighting (lighting fixtures)
- Secret Gardens Nursery (Sheila Piccini)
- Shine Quarry (basalt for landscaping)
- Sierra Pacific Windows (Rob Sorg)
- Simpson Doors (from Carls)
- Simpson Strong Tie (fasteners & hold downs)
- Stewart Excavating (Mark Stewart, foundation)
- Sunshine Propane (propane and tank)
- Therma-Tru Doors (from Carls)
- Tracy's Insulation (batts and blow in)
- Trex Decking (from Carls)
- Trussworks (roof trusses, Carl's)
- Velux (Skylights and Solar tubes, Carls)
- Versalam beams (from Carls)
- Warmboard (Bruce Hull)
- Wisbo Aquipex, Taco Pumps, Polaris tank (Sunshine Propane)
Followers
About Me
- Kala Point Builder
- Professional geologist (USGS, 1972-2008), amateur home remodeler and now builder. Interested in sailing, all things involving salt water, woodworking, and food in general. Owner of Paleo Seis Surveys LLC, consulting in Quaternary geology and geological hazards.